2022年1月31日月曜日

Minikubeでlocal永続ボリュームを使用するMariaDBをデプロイする

Minikubeでlocal永続ボリュームを使用するMariaDBをデプロイするには、以下の手順を実行します。

実行手順

1. MariaDBデータ格納用ディレクトリを作成
以下のコマンドでMariaDBデータ格納用ディレクトリを作成します。
minikube ssh

sudo mkdir -p /var/lib/mymariadb

exit

2. local永続ボリュームの作成
以下のコマンドでlocal永続ボリュームを作成します。
cat << EOF > local-mariadb-pv.yml
apiVersion: v1
kind: PersistentVolume
metadata:
  name: local-mariadb-pv
spec:
  capacity:
    storage: 5Gi
  accessModes:
  - ReadWriteOnce
  storageClassName: local-storage
  local:
    path: /var/lib/mymariadb
  nodeAffinity:
    required:
      nodeSelectorTerms:
      - matchExpressions:
        - key: kubernetes.io/hostname
          operator: In
          values:
          - minikube
EOF

kubectl apply -f ./local-mariadb-pv.yml

3. 永続ボリューム要求の作成
以下のコマンドで永続ボリューム要求を作成します。
cat << EOF > local-mariadb-pvc.yml
apiVersion: v1
kind: PersistentVolumeClaim
metadata:
  name: local-mariadb-pvc
spec:
  accessModes:
    - ReadWriteOnce
  storageClassName: local-storage
  resources:
    requests:
      storage: 5Gi
  volumeName: local-mariadb-pv
EOF

kubectl apply -f ./local-mariadb-pvc.yml

4. Deploymentの作成
以下のコマンドでmariadbのイメージと作成したlocal永続ボリュームを使用するDeploymentを作成します。
cat << EOF > mariadb-deployment.yml
apiVersion: apps/v1
kind: Deployment
metadata:
  name: mariadb-deployment
  labels:
    app: mymariadb
spec:
  replicas: 1
  selector:
    matchLabels:
      app: mymariadb
  strategy:
    type: Recreate
  template:
    metadata:
      labels:
        app: mymariadb
    spec:
      containers:
      - name: mymariadb
        image: mariadb:10.7-focal
        env:
        - name: MYSQL_ROOT_PASSWORD
          value: mymariadb
        ports:
        - containerPort: 3306
        volumeMounts:
        - name: mariadb-data
          mountPath: /var/lib/mysql
      volumes:
      - name: mariadb-data
        persistentVolumeClaim:
          claimName: local-mariadb-pvc
EOF

kubectl apply -f ./mariadb-deployment.yml

5. サービスの作成
以下のコマンドでサービスを作成します。
cat << EOF > mariadb-service.yml
apiVersion: v1
kind: Service
metadata:
  name: mariadb-service
spec:
  selector:
    app: mymariadb
  ports:
  - protocol: TCP
    port: 3306
    targetPort: 3306
EOF

kubectl apply -f ./mariadb-service.yml

6. Port-Fowardingで外部からアクセスできるようにする
kubectl port-forward --address 0.0.0.0 service/mariadb-service 3306:3306

※接続確認
mariadb -h ※MinikubeをインストールしたホストのIP -uroot -pmymariadb mysql

※MariaDBのクライアントは以下のコマンドでインストールできます。
sudo apt-get -y install mariadb-client

2022年1月30日日曜日

XFCEデスクトップ環境でログイン時に任意の画像を壁紙に設定する

XFCEデスクトップ環境でログイン時に任意の画像を壁紙に設定するには、以下のサンプルのように~/.config/autostartフォルダに.desktopファイルを作成します。

設定手順

以下のコマンドで任意の画像が壁紙として設定されるようにします。
mkdir -p ~/.config/autostart

※ Execパラメータに実行するプログラムを指定します。詳細はhttps://specifications.freedesktop.org/desktop-entry-spec/latest を参照してください。
cat << EOF > ~/.config/autostart/wallpaper.desktop
[Desktop Entry]
Encoding=UTF-8
Name=wallpaper
Exec=/usr/bin/xfconf-query -c xfce4-desktop -p /backdrop/screen0/monitorrdp0/workspace0/last-image -s /home/debian/画像/yellow_flower_photo.jpg
Terminal=false
Type=Application
EOF

〇実行例

MinikubeとHelmでlocal永続ボリュームを使用するDokuWikiをデプロイする

MinikubeとHelmでlocal永続ボリュームを使用するDokuWikiをデプロイするには、以下の手順を実行します。

実行手順

1. local永続ボリュームで使用するディレクトリの作成
以下のコマンドでlocal永続ボリュームで使用するディレクトリを作成します。
minikube ssh

sudo mkdir -p /var/dokuwiki

sudo chown 1001:1001 /var/dokuwiki

exit

2. local永続ボリュームの作成
以下のコマンドでlocal永続ボリュームを作成します。
cat << EOF > local-dokuwiki-pv.yml
apiVersion: v1
kind: PersistentVolume
metadata:
  name: local-dokuwiki-pv
spec:
  capacity:
    storage: 5Gi
  accessModes:
  - ReadWriteOnce
  storageClassName: local-storage
  local:
    path: /var/dokuwiki
  nodeAffinity:
    required:
      nodeSelectorTerms:
      - matchExpressions:
        - key: kubernetes.io/hostname
          operator: In
          values:
          - minikube
EOF

kubectl apply -f ./local-dokuwiki-pv.yml

3. 永続ボリューム要求の作成
以下のコマンドで永続ボリューム要求を作成します。
cat << EOF > local-dokuwiki-pvc.yml
apiVersion: v1
kind: PersistentVolumeClaim
metadata:
  name: local-dokuwiki-pvc
spec:
  accessModes:
    - ReadWriteOnce
  storageClassName: local-storage
  resources:
    requests:
      storage: 5Gi
  volumeName: local-dokuwiki-pv
EOF

kubectl apply -f ./local-dokuwiki-pvc.yml

4. HelpでDokuWikiのインストール
以下のコマンドでHelmでDokuWikiをインストールします。
helm repo update

helm install my-dokuwiki bitnami/dokuwiki --set dokuwikiUsername=dokuwiki --set dokuwikiPassword=mydokuwiki --set dokuwikiEmail=dokuwiki@localhost.localdomain --set dokuwikiFullName="テストユーザ" --set dokuwikiWikiName="サンプルDokuWiki"   --set persistence.existingClaim=local-dokuwiki-pvc

パラメータの意味は以下になります。
dokuwikiUsername: DokuWikiのユーザ名
dokuwikiPassword: DokuWikiのパスワード
dokuwikiEmail: DokuWikiのemailアドレス
dokuwikiFullName: ユーザのフルネーム
dokuwikiWikiName: DokuWikiの名称
persistence.existingClaim=local-dokuwiki-pvc: 永続ボリューム要求の名称

その他のパラメータについては、以下を参照してください
https://github.com/bitnami/charts/tree/master/bitnami/dokuwiki

※アンインストールする場合は、以下のコマンドを実行します。
helm uninstall my-dokuwiki

6. Port-Fowardingで外部からアクセスできるようにする
kubectl port-forward --address 0.0.0.0 deployment/my-dokuwiki  8080:8080

ブラウザからhttp://<ホスト名:8080/ にアクセスします

〇DokuWikiの画面

2022年1月29日土曜日

PySimpleGUIでカラム要素のサイズ設定とスクロール可否を設定する

カラム要素のサイズを設定するにはsizeパラメータにタプルでサイズx,yを指定します。スクロール可否を設定するには、scrollableパラメータで指定します。

サンプル実行手順

以下のファイルを保存して、実行します。
column_size_scrollable.py
import PySimpleGUI as sg

sg.theme('SystemDefault')
columns = sg.Column(
  [[sg.Text("Col1"), sg.Text("Col2"), sg.Text("Col3")]],
  size=(300,200),
  scrollable=True,
  background_color='#7799dd'
)
layout = [[columns]]

window = sg.Window('カラムサンプル', layout, size=(100, 100))
# イベントループ
while True:
    event, values = window.read()
    if event == sg.WIN_CLOSED:
        break

window.close()

実行コマンド
python column_size_scrollable.py

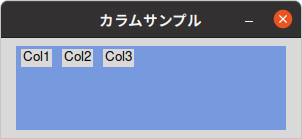
〇実行結果

関連情報

PySimpleGUIでカラム要素内の要素の水平方向位置揃えを指定する

PySimpleGUIでカラム要素をスペースに合わせて広がるように指定する

PySimpleGUIでカラム要素の背景色を指定する

・PySimpleGUIに関する他の記事はこちらを参照してください。

Minikubeでlocal永続ボリュームを使用するDokuWikiをデプロイする

Minikubeでlocal永続ボリュームを使用するDokuWikiをデプロイするには、以下の手順を実行します。

実行手順

1. local永続ボリュームで使用するディレクトリの作成
以下のコマンドでlocal永続ボリュームで使用するディレクトリを作成します。
minikube ssh

sudo mkdir -p /var/dokuwiki

sudo chown 1001:1001 /var/dokuwiki

exit

2. local永続ボリュームの作成
以下のコマンドでlocal永続ボリュームを作成します。
cat << EOF > local-dokuwiki-pv.yml
apiVersion: v1
kind: PersistentVolume
metadata:
  name: local-dokuwiki-pv
spec:
  capacity:
    storage: 5Gi
  accessModes:
  - ReadWriteOnce
  storageClassName: local-storage
  local:
    path: /var/dokuwiki
  nodeAffinity:
    required:
      nodeSelectorTerms:
      - matchExpressions:
        - key: kubernetes.io/hostname
          operator: In
          values:
          - minikube
EOF

kubectl apply -f ./local-dokuwiki-pv.yml

3. 永続ボリューム要求の作成
以下のコマンドで永続ボリューム要求を作成します。
cat << EOF > local-dokuwiki-pvc.yml
apiVersion: v1
kind: PersistentVolumeClaim
metadata:
  name: local-dokuwiki-pvc
spec:
  accessModes:
    - ReadWriteOnce
  storageClassName: local-storage
  resources:
    requests:
      storage: 5Gi
  volumeName: local-dokuwiki-pv
EOF

kubectl apply -f ./local-dokuwiki-pvc.yml

4. Deploymentの作成
以下のコマンドでbitnami/dokuwikiのイメージと作成したlocal永続ボリュームを使用するDeploymentを作成します。
cat << EOF > dokuwiki-deployment.yml
apiVersion: apps/v1
kind: Deployment
metadata:
  name: dokuwiki-deployment
  labels:
    app: mydokuwiki
spec:
  replicas: 1
  selector:
    matchLabels:
      app: mydokuwiki
  template:
    metadata:
      labels:
        app: mydokuwiki
    spec:
      containers:
      - name: mydokuwiki
        image: bitnami/dokuwiki:latest
        ports:
        - containerPort: 8080
        env:
        - name: DOKUWIKI_USERNAME
          value: "dokuwiki"
        - name: DOKUWIKI_FULL_NAME
          value: "テストユーザ"
        - name: DOKUWIKI_PASSWORD
          value: "mydokuwiki"
        - name: DOKUWIKI_WIKI_NAME
          value: "テストDokuwiki"
        - name: DOKUWIKI_EMAIL
          value: "dokuwiki@localhost.localdomain"
        volumeMounts:
        - name: documentroot
          mountPath: /bitnami/dokuwiki
      volumes:
      - name: documentroot
        persistentVolumeClaim:
          claimName: local-dokuwiki-pvc
EOF

kubectl apply -f ./dokuwiki-deployment.yml

5. サービスの作成
以下のコマンドでサービスを作成します。
cat << EOF > httpd-service.yml
apiVersion: v1
kind: Service
metadata:
  name: dokuwiki-service
spec:
  selector:
    app: mydokuwiki
  ports:
  - protocol: TCP
    port: 8080
    targetPort: 8080
EOF

kubectl apply -f ./httpd-service.yml

6. Port-Fowardingで外部からアクセスできるようにする
kubectl port-forward --address 0.0.0.0 service/dokuwiki-service 8080:8080
ブラウザからhttp://<ホスト名:8080/ にアクセスします

〇DokuWikiの画面

2022年1月28日金曜日

DockerでDebian 11(Bullseye)のMATEデスクトップ環境にリモートデスクトップで接続できるコンテナを作成する

DockerでDebian 11(Bullseye)のMATEデスクトップ環境にリモートデスクトップで接続できるコンテナを作成するには、以下の手順を実行します。

〇リモートデスクトップで接続したDocker上のDebian 11(Bullseye) MATEデスクトップ環境

作成手順

1. 以下のDockerfileを使用してイメージを作成します
Dockerfile
FROM debian:bullseye

ENV DEBIAN_FRONTEND=noninteractive

RUN apt-get update \
  && apt-get -y install vim task-japanese locales-all \
  && echo 'LC_ALL=ja_JP.UTF-8' > /etc/default/locale \
  && echo 'LANG=ja_JP.UTF-8' >> /etc/default/locale \
  && apt-get -y install task-mate-desktop xrdp supervisor task-japanese-desktop ibus-mozc fonts-ipafont fonts-ipafont-gothic fonts-ipafont-mincho \
  && echo '[supervisord]' >> /etc/supervisor/conf.d/sv.conf \
  && echo 'nodaemon=true' >> /etc/supervisor/conf.d/sv.conf \
  && echo '[program:xrdp-sesman]' >> /etc/supervisor/conf.d/sv.conf \
  && echo 'command=/usr/sbin/xrdp-sesman -nodaemon' >> /etc/supervisor/conf.d/sv.conf \
  && echo 'autostart=true' >> /etc/supervisor/conf.d/sv.conf \
  && echo 'autorestart=true' >> /etc/supervisor/conf.d/sv.conf \
  && echo 'priority=100' >> /etc/supervisor/conf.d/sv.conf \
  && echo '[program:xrdp]' >> /etc/supervisor/conf.d/sv.conf \
  && echo 'command=/usr/sbin/xrdp -nodaemon' >> /etc/supervisor/conf.d/sv.conf \
  && echo 'autostart=true' >> /etc/supervisor/conf.d/sv.conf \
  && echo 'autorestart=true' >> /etc/supervisor/conf.d/sv.conf \
  && echo 'priority=200' >> /etc/supervisor/conf.d/sv.conf \
  && groupadd -g 1000 debian \
  && useradd -d /home/debian -m -s /bin/bash -u 1000 -g 1000 debian \
  && echo 'debian:debian' | chpasswd \
  && echo "debian ALL=NOPASSWD: ALL" >> /etc/sudoers \
  && apt-get clean && apt-get autoremove \
  && rm -rf /var/cache/apt/archives/* /var/lib/apt/lists/*

CMD ["bash", "-c", "/usr/bin/supervisord -c /etc/supervisor/supervisord.conf"]

・イメージ作成コマンド
docker build --no-cache -t debian11mate .

2. 作成したイメージを使用してコンテナを実行します。
docker run --rm -v `pwd`:/home/debian -p 3389:3389 debian11mate

3. WindowsのリモートデスクトップやLinux上のRemminaからDockerホストのIPを指定して接続します。
ユーザ名debian、パスワードdebianでログインしてください。

※イメージを削除する場合は、以下のコマンドを実行します
docker rmi debian11mate

関連情報

・Xfce版は以下のページを参照してください。
DockerでDebian 11(Bullseye)のXfceデスクトップ環境にリモートデスクトップで接続できるコンテナを作成する

MinikubeでDebian 11(Bullseye)のMATEデスクトップ環境をデプロイする

Microk8sでDebian 11(Bullseye)のMATEデスクトップ環境をデプロイする

PySimpleGUIでカラム要素内の要素の水平方向位置揃えを指定する

PySimpleGUIでカラム要素内の要素の水平方向位置揃えを指定するには、element_justificationパラメータで指定します。right,left,centerが指定できます。

サンプル実行手順

以下のファイルを保存して、実行します。
column_element_justification.py
import PySimpleGUI as sg

sg.theme('SystemDefault')
columns = sg.Column(
  [[sg.Text("Col1"), sg.Text("Col2"), sg.Text("Col3")]],
  element_justification='right',
  expand_x=True, expand_y=True,
  background_color='#7799dd'
)
layout = [[columns]]

window = sg.Window('カラムサンプル', layout, size=(300, 100))
# イベントループ
while True:
    event, values = window.read()
    if event == sg.WIN_CLOSED:
        break

実行コマンド
python column_element_justification.py

〇実行結果

関連情報

PySimpleGUIでカラム要素のサイズ設定とスクロール可否を設定する

PySimpleGUIでカラム要素をスペースに合わせて広がるように指定する

PySimpleGUIでカラム要素の背景色を指定する

・PySimpleGUIに関する他の記事はこちらを参照してください。

MinikubeとHelmでGlusterFS上の永続ボリュームを使用するApache Httpdをデプロイする

MinikubeとHelmでGlusterFS上の永続ボリュームを使用するApache Httpdをデプロイするには、以下の手順を実行します。

実行手順

1. MinikubeでのGlusterfs準備
※GlusterFSクラスターは事前に準備しておきます。

※minikube内の/etc/hostsにエントリを追加するためのファイルにエントリ追加
mkdir -p ~/.minikube/files/etc
echo 'xxx.xxx.xxx.xxx glusternode1' >> ~/.minikube/files/etc/hosts
echo 'xxx.xxx.xxx.xxx glusternode2' >> ~/.minikube/files/etc/hosts
echo 'xxx.xxx.xxx.xxx glusternode3' >> ~/.minikube/files/etc/hosts
IPアドレスとホスト名は適宜変更してください。

※minikube内にglusterfs-clientをインストールする
minikube ssh
sudo apt-get update && sudo apt-get install -y glusterfs-client
exit

2. テスト用ページの作成
Glusterfsサーバーのホストにテスト用ページを作成します。
echo '<html><head><title>sample</title></head><body>contents on GlusterFS server.</body></html>' | sudo tee /glusterfs/index.html
※パスなどは適宜変更してください

3. Endpointsの作成
以下のIPアドレスを適宜変更して、Endpointsを作成します。
cat << EOF > glusterfs-endpoints.yml
apiVersion: v1
kind: Endpoints
metadata:
  name: glusterfs-cluster
subsets:
- addresses:
  - ip: xxx.xxx.xxx.xxx
  ports:
  - port: 1
- addresses:
  - ip: xxx.xxx.xxx.xxx
  ports:
  - port: 1
- addresses:
  - ip: xxx.xxx.xxx.xxx
  ports:
  - port: 1
EOF

kubectl apply -f ./glusterfs-endpoints.yml

4. 永続ボリュームの作成
以下のGlusterFSボリューム名(myvolumeの部分)を変更して、永続ボリュームを作成します。
cat << EOF > glusterfs-httpd-pv.yml
apiVersion: v1
kind: PersistentVolume
metadata:
  name: glusterfs-httpd-pv
spec:
  capacity:
    storage: 2Gi
  accessModes:
    - ReadOnlyMany
  glusterfs:
    endpoints: glusterfs-cluster
    path: myvolume
    readOnly: false
EOF

kubectl apply -f ./glusterfs-httpd-pv.yml

5. 永続ボリューム要求の作成
以下のコマンドを実行して、永続ボリューム要求を作成します。
cat << EOF > glusterfs-httpd-pvc.yml
apiVersion: v1
kind: PersistentVolumeClaim
metadata:
  name: glusterfs-httpd-pvc
spec:
  accessModes:
    - ReadOnlyMany
  storageClassName: ""
  resources:
    requests:
      storage: 2Gi
  volumeName: glusterfs-httpd-pv
EOF

kubectl apply -f ./glusterfs-httpd-pvc.yml

4. HelmでApacheのインストール
以下のコマンドでbitnamiのApache Httpdをインストールします。htdocsPVCパラメータで使用する永続ボリューム要求を指定します。
helm repo update

helm install my-httpd-apache bitnami/apache --set htdocsPVC=glusterfs-httpd-pvc

※その他のパラメータについては、以下のbitnami apacheのgithubリポジトリを参照してください
https://github.com/bitnami/charts/tree/master/bitnami/apache
5. Port-Fowardingで外部からアクセスできるようにする
以下のコマンドを実行して、外部からアクセスできるようにします。
kubectl port-forward --address 0.0.0.0 deployment/my-httpd-apache  8080:8080

ブラウザからhttp://<ホスト名:8080/ にアクセスします

※アンインストールする時には以下のコマンドを実行します。
helm uninstall my-httpd-apache

2022年1月27日木曜日

MinikubeでDebian 11(Bullseye)のXfceデスクトップ環境をデプロイする

MinikubeでDebian 11(Bullseye)のXfceデスクトップ環境をデプロイするには、以下の手順を実行します。デスクトップ環境にはリモートデスクトップで接続します。

〇リモートデスクトップで接続したMinikube上のDebian 11(Bullseye)デスクトップ環境

作成手順

1. 以下のDockerfileを使用してイメージを作成します
# ホスト側で実行して、dockerの向き先をminikubeにします
eval $(minikube -p minikube docker-env)

cat << EOF > Dockerfile
FROM debian:bullseye

ENV DEBIAN_FRONTEND=noninteractive

RUN apt-get update \
  && apt-get -y install vim task-japanese locales-all \
  && echo 'LC_ALL=ja_JP.UTF-8' > /etc/default/locale \
  && echo 'LANG=ja_JP.UTF-8' >> /etc/default/locale \
  && apt-get -y install xfce4 dbus-x11 xfce4-terminal xrdp supervisor task-japanese-desktop ibus-mozc fonts-ipafont fonts-ipafont-gothic fonts-ipafont-mincho libreoffice \
  && echo '[supervisord]' >> /etc/supervisor/conf.d/sv.conf \
  && echo 'nodaemon=true' >> /etc/supervisor/conf.d/sv.conf \
  && echo '[program:xrdp-sesman]' >> /etc/supervisor/conf.d/sv.conf \
  && echo 'command=/usr/sbin/xrdp-sesman -nodaemon' >> /etc/supervisor/conf.d/sv.conf \
  && echo 'autostart=true' >> /etc/supervisor/conf.d/sv.conf \
  && echo 'autorestart=true' >> /etc/supervisor/conf.d/sv.conf \
  && echo 'priority=100' >> /etc/supervisor/conf.d/sv.conf \
  && echo '[program:xrdp]' >> /etc/supervisor/conf.d/sv.conf \
  && echo 'command=/usr/sbin/xrdp -nodaemon' >> /etc/supervisor/conf.d/sv.conf \
  && echo 'autostart=true' >> /etc/supervisor/conf.d/sv.conf \
  && echo 'autorestart=true' >> /etc/supervisor/conf.d/sv.conf \
  && echo 'priority=200' >> /etc/supervisor/conf.d/sv.conf \
  && groupadd -g 1000 debian \
  && useradd -d /home/debian -m -s /bin/bash -u 1000 -g 1000 debian \
  && echo 'debian:debian' | chpasswd \
  && echo "debian ALL=NOPASSWD: ALL" >> /etc/sudoers \
  && apt-get clean && apt-get autoremove \
  && rm -rf /var/cache/apt/archives/* /var/lib/apt/lists/*

CMD ["bash", "-c", "/usr/bin/supervisord -c /etc/supervisor/supervisord.conf"]
EOF

# イメージ作成コマンド
docker build --no-cache -t debian11xfce .

2. 永続ボリューム用のフォルダ作成
minikube ssh

sudo mkdir -p /var/debian11xfce

sudo chmod a+w /var/debian11xfce

exit

3. local永続ボリュームの作成
以下のコマンドでlocal永続ボリュームを作成します。
cat << EOF > local-debian11xfce-pv.yml
apiVersion: v1
kind: PersistentVolume
metadata:
  name: local-debian11xfce-pv
spec:
  capacity:
    storage: 5Gi
  accessModes:
  - ReadWriteOnce
  storageClassName: local-storage
  local:
    path: /var/debian11xfce
  nodeAffinity:
    required:
      nodeSelectorTerms:
      - matchExpressions:
        - key: kubernetes.io/hostname
          operator: In
          values:
          - minikube
EOF

kubectl apply -f ./local-debian11xfce-pv.yml

4. 永続ボリューム要求の作成
以下のコマンドで永続ボリューム要求を作成します。
cat << EOF > local-debian11xfce-pvc.yml
apiVersion: v1
kind: PersistentVolumeClaim
metadata:
  name: local-debian11xfce-pvc
spec:
  accessModes:
    - ReadWriteOnce
  storageClassName: local-storage
  resources:
    requests:
      storage: 5Gi
  volumeName: local-debian11xfce-pv
EOF

kubectl apply -f ./local-debian11xfce-pvc.yml

5. Deploymentの作成
以下のコマンドで、作成したdebian11xfceのイメージと作成したlocal永続ボリュームを使用するDeploymentを作成します。
cat << EOF > debian11xfce-deployment.yml
apiVersion: apps/v1
kind: Deployment
metadata:
  name: debian11xfce-deployment
  labels:
    app: mydebian11xfce
spec:
  replicas: 1
  selector:
    matchLabels:
      app: mydebian11xfce
  strategy:
    type: Recreate
  template:
    metadata:
      labels:
        app: mydebian11xfce
    spec:
      containers:
      - name: mydebian11xfce
        image: debian11xfce
        imagePullPolicy: Never # ローカルイメージを使用する
        ports:
        - containerPort: 3389
        volumeMounts:
        - name: debian11xfce-data
          mountPath: /home/debian
      volumes:
      - name: debian11xfce-data
        persistentVolumeClaim:
          claimName: local-debian11xfce-pvc
EOF

kubectl apply -f ./debian11xfce-deployment.yml

6. サービスの作成
以下のコマンドでサービスを作成します。
cat << EOF > debian11xfce-service.yml
apiVersion: v1
kind: Service
metadata:
  name: debian11xfce-service
spec:
  selector:
    app: mydebian11xfce
  ports:
  - protocol: TCP
    port: 3389
    targetPort: 3389
EOF

kubectl apply -f ./debian11xfce-service.yml

7. Port-Fowardingで外部からアクセスできるようにする
kubectl port-forward --address 0.0.0.0 service/debian11xfce-service 3389:3389

8. WindowsのリモートデスクトップやLinux上のRemminaからMinikubeホストのIPを指定して接続します。
ユーザ名debian、パスワードdebianでログインしてください。

関連情報

・Docker版は以下のページを参照してください。
DockerでDebian 11(Bullseye)のXfceデスクトップ環境にリモートデスクトップで接続できるコンテナを作成する

PySimpleGUIでカラム要素をスペースに合わせて広がるように指定する

PySimpleGUIでカラム要素をスペースに合わせて広がるように指定するには、Columnのexpand_x(水平方向)、expand_y(垂直方向)パラメータで指定します。

サンプル実行手順

以下のファイルを保存して、実行します。
column_expand.py
import PySimpleGUI as sg

sg.theme('SystemDefault')
columns = sg.Column(
  [[sg.Text("Col1"), sg.Text("Col2"), sg.Text("Col3")]],
  expand_x=True, expand_y=True,
  background_color='#7799dd'
)
layout = [[columns]]

window = sg.Window('カラムサンプル', layout, size=(300, 100))
# イベントループ
while True:
    event, values = window.read()
    if event == sg.WIN_CLOSED:
        break

window.close()

実行コマンド
python column_expand.py

〇実行結果

関連情報

PySimpleGUIでカラム要素のサイズ設定とスクロール可否を設定する

PySimpleGUIでカラム要素内の要素の水平方向位置揃えを指定する

PySimpleGUIでカラム要素の背景色を指定する

・PySimpleGUIに関する他の記事はこちらを参照してください。

MinikubeとHelmでNFS上の永続ボリュームを使用するApache Httpdをデプロイする

MinikubeとHelmでNFS上の永続ボリュームを使用するApache Httpdをデプロイするには、以下の手順を実行します。

実行手順

1. テスト用ページの作成
NFSサーバーのホストにテスト用ページを作成します。
sudo mkdir -p /shared_dir/html

echo '<html><head><title>sample</title></head><body>contents on NFS server.</body></html>' | sudo tee /shared_dir/html/index.html

2.永続ボリュームの作成
以下のコマンドで、NFSサーバ上の永続ストレージを作成します。
cat << EOF > nfs-httpd-pv.yml
apiVersion: v1
kind: PersistentVolume
metadata:
  name: nfs-httpd-pv
spec:
  capacity:
    storage: 2Gi
  accessModes:
    - ReadOnlyMany
  nfs:
    server: ※NFSサーバのIPアドレス
    path: "/shared_dir/html" ※NFSサーバのパス
  mountOptions:
    - nfsvers=4.2
EOF

kubectl apply -f ./nfs-httpd-pv.yml

3. 永続ボリューム要求の作成
以下のコマンドで、永続ストレージ要求を作成します。
cat << EOF > nfs-httpd-pvc.yml
apiVersion: v1
kind: PersistentVolumeClaim
metadata:
  name: nfs-httpd-pvc
spec:
  accessModes:
    - ReadOnlyMany
  storageClassName: ""
  resources:
    requests:
      storage: 2Gi
  volumeName: nfs-httpd-pv
EOF

kubectl apply -f ./nfs-httpd-pvc.yml

4. HelmでApacheのインストール
以下のコマンドでbitnamiのApache Httpdをインストールします。htdocsPVCパラメータで使用する永続ボリューム要求を指定します。
helm repo update

helm install my-httpd-apache bitnami/apache --set htdocsPVC=nfs-httpd-pvc

※その他のパラメータについては、以下のbitnami apacheのgithubリポジトリを参照してください
https://github.com/bitnami/charts/tree/master/bitnami/apache

5. Port-Fowardingで外部からアクセスできるようにする
以下のコマンドを実行して、外部からアクセスできるようにします。
kubectl port-forward --address 0.0.0.0 deployment/my-httpd-apache  8080:8080

ブラウザからhttp://<ホスト名:8080/ にアクセスします

※アンインストールする時には以下のコマンドを実行します。
helm uninstall my-httpd-apache

関連情報

Ubuntu 20.04にNFSサーバをインストールする

2022年1月26日水曜日

DockerでDebian 11(Bullseye)のXfceデスクトップ環境にリモートデスクトップで接続できるコンテナを作成する

DockerでDebian 11(Bullseye)のXfceデスクトップ環境にリモートデスクトップで接続できるコンテナを作成するには、以下の手順を実行します。

〇リモートデスクトップで接続したDocker上のDebian 11(Bullseye)デスクトップ環境

作成手順

1. 以下のDockerfileを使用してイメージを作成します
Dockerfile
FROM debian:bullseye

ENV DEBIAN_FRONTEND=noninteractive

RUN apt-get update \
  && apt-get -y install vim task-japanese locales-all \
  && echo 'LC_ALL=ja_JP.UTF-8' > /etc/default/locale \
  && echo 'LANG=ja_JP.UTF-8' >> /etc/default/locale \
  && apt-get -y install xfce4 dbus-x11 xfce4-terminal xrdp supervisor task-japanese-desktop ibus-mozc fonts-ipafont fonts-ipafont-gothic fonts-ipafont-mincho libreoffice \
  && echo '[supervisord]' >> /etc/supervisor/conf.d/sv.conf \
  && echo 'nodaemon=true' >> /etc/supervisor/conf.d/sv.conf \
  && echo '[program:xrdp-sesman]' >> /etc/supervisor/conf.d/sv.conf \
  && echo 'command=/usr/sbin/xrdp-sesman -nodaemon' >> /etc/supervisor/conf.d/sv.conf \
  && echo 'autostart=true' >> /etc/supervisor/conf.d/sv.conf \
  && echo 'autorestart=true' >> /etc/supervisor/conf.d/sv.conf \
  && echo 'priority=100' >> /etc/supervisor/conf.d/sv.conf \
  && echo '[program:xrdp]' >> /etc/supervisor/conf.d/sv.conf \
  && echo 'command=/usr/sbin/xrdp -nodaemon' >> /etc/supervisor/conf.d/sv.conf \
  && echo 'autostart=true' >> /etc/supervisor/conf.d/sv.conf \
  && echo 'autorestart=true' >> /etc/supervisor/conf.d/sv.conf \
  && echo 'priority=200' >> /etc/supervisor/conf.d/sv.conf \
  && groupadd -g 1000 debian \
  && useradd -d /home/debian -m -s /bin/bash -u 1000 -g 1000 debian \
  && echo 'debian:debian' | chpasswd \
  && echo "debian ALL=NOPASSWD: ALL" >> /etc/sudoers \
  && apt-get clean && apt-get autoremove \
  && rm -rf /var/cache/apt/archives/* /var/lib/apt/lists/*

CMD ["bash", "-c", "/usr/bin/supervisord -c /etc/supervisor/supervisord.conf"]

・イメージ作成コマンド
docker build --no-cache -t debian11xfce .

2. 作成したイメージを使用してコンテナを実行します。
docker run --rm -v `pwd`:/home/debian -p 3389:3389 debian11xfce

3. WindowsのリモートデスクトップやLinux上のRemminaからDockerホストのIPを指定して接続します。
ユーザ名debian、パスワードdebianでログインしてください。

※イメージを削除する場合は、以下のコマンドを実行します
docker rmi debian11xfce

関連情報

・Minikube版Xfceデスクトップは以下のページを参照してください。
MinikubeでDebian 11(Bullseye)のXfceデスクトップ環境をデプロイする

・Microk8s版Xfceデスクトップは以下のページを参照してください。
Microk8sでDebian 11(Bullseye)のXfceデスクトップ環境をデプロイする

・MATEデスクトップ版
DockerでDebian 11(Bullseye)のMATEデスクトップ環境にリモートデスクトップで接続できるコンテナを作成する

PySimpleGUIでカラム要素の背景色を指定する

PySimpleGUIでカラム要素の背景色を指定するには、Columnのbackground_colorパラメータで指定します。

サンプル実行手順

以下のファイルを保存して、実行します。
column_backgroundcolor.py
import PySimpleGUI as sg

sg.theme('SystemDefault')
columns = sg.Column(
  [[sg.Text("Col1"), sg.Text("Col2"), sg.Text("Col3")]],
  background_color='#7799dd'
)
layout = [[columns]]

window = sg.Window('カラムサンプル', layout)
# イベントループ
while True:
    event, values = window.read()
    if event == sg.WIN_CLOSED:
        break

window.close()

実行コマンド
python column_backgroundcolor.py

〇実行結果

関連情報

PySimpleGUIでカラム要素のサイズ設定とスクロール可否を設定する

PySimpleGUIでカラム要素内の要素の水平方向位置揃えを指定する

PySimpleGUIでカラム要素をスペースに合わせて広がるように指定する

・PySimpleGUIに関する他の記事はこちらを参照してください。

MinikubeとHelmでlocal永続ボリュームを使用するApache Httpdをデプロイする

MinikubeとHelmでlocal永続ボリュームを使用するApache Httpdをデプロイするには、以下の手順を実行します。

実行手順

1. テスト用ページの作成
minikubeにテスト用ページを作成します。
minikube ssh

sudo mkdir -p /var/mywww/html

echo '<html><head><title>sample</title></head><body>sample.</body></html>' | sudo tee /var/mywww/html/index.html

exit

2.local永続ボリュームの作成
以下のコマンドを実行してlocal永続ボリュームを作成します
cat << EOF > local-httpd-pv.yml
apiVersion: v1
kind: PersistentVolume
metadata:
  name: local-httpd-pv
spec:
  capacity:
    storage: 5Gi
  accessModes:
  - ReadOnlyMany
  storageClassName: local-storage
  local:
    path: /var/mywww/html
  nodeAffinity:
    required:
      nodeSelectorTerms:
      - matchExpressions:
        - key: kubernetes.io/hostname
          operator: In
          values:
          - minikube
EOF

kubectl apply -f ./local-httpd-pv.yml

3. 永続ボリューム要求の作成
以下のコマンドを実行してlocal永続ボリューム要求を作成します
cat << EOF > local-httpd-pvc.yml
apiVersion: v1
kind: PersistentVolumeClaim
metadata:
  name: local-httpd-pvc
spec:
  accessModes:
    - ReadOnlyMany
  storageClassName: local-storage
  resources:
    requests:
      storage: 5Gi
  volumeName: local-httpd-pv
EOF

kubectl apply -f ./local-httpd-pvc.yml

4. HelmでApacheのインストール
以下のコマンドでbitnamiのApache Httpdをインストールします。htdocsPVCパラメータで使用する永続ボリューム要求を指定します。

helm repo update

helm install my-httpd-apache bitnami/apache --set htdocsPVC=local-httpd-pvc

※その他のパラメータについては、以下のbitnami apacheのgithubリポジトリを参照してください
https://github.com/bitnami/charts/tree/master/bitnami/apache

5. Port-Fowardingで外部からアクセスできるようにする
以下のコマンドを実行して、外部からアクセスできるようにします。
kubectl port-forward --address 0.0.0.0 deployment/my-httpd-apache  8080:8080

ブラウザからhttp://<ホスト名:8080/ にアクセスします

※アンインストールする時には以下のコマンドを実行します。
helm uninstall my-httpd-apache

2022年1月25日火曜日

Ubuntu20.04にインストールしたMinikubeとkubectl proxyを自動起動するように設定する

Ubuntu20.04にインストールしたMinikubeとkubectl proxyを、ホスト起動時に自動起動するように設定するには、以下の手順を実行します。

実行手順

1. Minikubeサービスの作成
以下のコマンドを実行してMinikubeサービスを作成します。ユーザ名やフォルダなどは適宜変更してください。
cat << EOF | sudo tee /etc/systemd/system/minikube.service
[Unit]
Description=Minikube Service
After=docker.service

[Service]
Type=oneshot
RemainAfterExit=yes
WorkingDirectory=/home/ubuntu
ExecStart=/usr/local/bin/minikube start
ExecStop=/usr/local/bin/minikube stop
User=ubuntu
Group=ubuntu

[Install]
WantedBy=multi-user.target
EOF

sudo systemctl daemon-reload

# サービス開始
sudo systemctl start minikube.service

# サービス有効化
sudo systemctl enable minikube.service

# サービスステータス
sudo systemctl status minikube.service

2. kubectlproxyサービスの作成
以下のコマンドを実行してkubectlproxyサービスを作成します。ユーザやIPアドレスは適宜変更してください。
cat << EOF | sudo tee /etc/systemd/system/kubectlproxy.service
[Unit]
Description=kubectl proxy
After=minikube.service

[Service]
ExecStart=/usr/local/bin/minikube kubectl --  proxy --address='192.168.1.XXX' --disable-filter=true
StartLimitInterval=0
RestartSec=10
Restart=always
User=ubuntu
Group=ubuntu

[Install]
WantedBy=multi-user.target
EOF

# サービス開始
sudo systemctl start kubectlproxy.service

# サービス有効化
sudo systemctl enable kubectlproxy.service

# サービスステータス
sudo systemctl status kubectlproxy.service

※変更履歴
2022/01/28: minikube.serviceに「After=docker.service」を追記。

MinikubeでGlusterFSの永続ストレージを使用するApache Httpdをデプロイする

MinikubeでGlusterFSの永続ストレージを使用するApache Httpdをデプロイするには、以下の手順を実行します。

実行手順

1. MinikubeでのGlusterfs準備
※GlusterFSクラスターは事前に準備しておきます。

※minikube内の/etc/hostsにエントリを追加するためのファイルにエントリ追加
mkdir -p ~/.minikube/files/etc
echo 'xxx.xxx.xxx.xxx glusternode1' >> ~/.minikube/files/etc/hosts
echo 'xxx.xxx.xxx.xxx glusternode2' >> ~/.minikube/files/etc/hosts
echo 'xxx.xxx.xxx.xxx glusternode3' >> ~/.minikube/files/etc/hosts
IPアドレスとホスト名は適宜変更してください。

※minikube内にglusterfs-clientをインストールする
minikube ssh
sudo apt-get update && sudo apt-get install -y glusterfs-client
exit

2. テスト用ページの作成
Glusterfsサーバーのホストにテスト用ページを作成します。
echo '<html><head><title>sample</title></head><body>contents on GlusterFS server.</body></html>' | sudo tee /glusterfs/index.html
※パスなどは適宜変更してください

3. Endpointsの作成
以下のIPアドレスを適宜変更して、Endpointsを作成します。
cat << EOF > glusterfs-endpoints.yml
apiVersion: v1
kind: Endpoints
metadata:
  name: glusterfs-cluster
subsets:
- addresses:
  - ip: xxx.xxx.xxx.xxx
  ports:
  - port: 1
- addresses:
  - ip: xxx.xxx.xxx.xxx
  ports:
  - port: 1
- addresses:
  - ip: xxx.xxx.xxx.xxx
  ports:
  - port: 1
EOF

kubectl apply -f ./glusterfs-endpoints.yml

4. 永続ボリュームの作成
以下のGlusterFSボリューム名(myvolumeの部分)を変更して、永続ボリュームを作成します。
cat << EOF > glusterfs-httpd-pv.yml
apiVersion: v1
kind: PersistentVolume
metadata:
  name: glusterfs-httpd-pv
spec:
  capacity:
    storage: 2Gi
  accessModes:
    - ReadOnlyMany
  glusterfs:
    endpoints: glusterfs-cluster
    path: myvolume
    readOnly: false
EOF

kubectl apply -f ./glusterfs-httpd-pv.yml

5. 永続ボリューム要求の作成
以下のコマンドを実行して、永続ボリューム要求を作成します。
cat << EOF > glusterfs-httpd-pvc.yml
apiVersion: v1
kind: PersistentVolumeClaim
metadata:
  name: glusterfs-httpd-pvc
spec:
  accessModes:
    - ReadOnlyMany
  storageClassName: ""
  resources:
    requests:
      storage: 2Gi
  volumeName: glusterfs-httpd-pv
EOF

kubectl apply -f ./glusterfs-httpd-pvc.yml

6. Deploymentの作成
以下のコマンドを実行してDeploymentを作成します。
cat << EOF > glusterfs-httpd-deployment.yml
apiVersion: apps/v1
kind: Deployment
metadata:
  name: httpd-deployment
  labels:
    app: myhttpd
spec:
  replicas: 1
  selector:
    matchLabels:
      app: myhttpd
  template:
    metadata:
      labels:
        app: myhttpd
    spec:
      containers:
      - name: myhttpd
        image: httpd:2.4-alpine
        ports:
        - containerPort: 80
        volumeMounts:
        - name: documentroot
          mountPath: /usr/local/apache2/htdocs
      volumes:
      - name: documentroot
        persistentVolumeClaim:
          claimName: glusterfs-httpd-pvc
EOF

kubectl apply -f ./glusterfs-httpd-deployment.yml

7. サービスの作成
以下のコマンドを実行してサービスを作成します。
cat << EOF > httpd-service.yml
apiVersion: v1
kind: Service
metadata:
  name: httpd-service
spec:
  selector:
    app: myhttpd
  ports:
  - protocol: TCP
    port: 8080
    targetPort: 80
EOF

kubectl apply -f ./httpd-service.yml

8. Port-Fowardingで外部からアクセスできるようにする
以下のコマンドを実行して、外部からアクセスできるようにします。
kubectl port-forward --address 0.0.0.0 service/httpd-service 8080:8080
ブラウザからhttp://<ホスト名:8080/ にアクセスします

2022年1月24日月曜日

Apache Supersetのまとめ

Apache SupersetはPython製のBIツールです。データベース内のデータを集計して、コーディング無しでダッシュボード等を作成することができます。

インストール方法

※Ubuntu 20.04の場合
Ubuntu 20.04にApache SupersetとMariaDBをインストールする

Ubuntu 20.04にApache SupersetとPostgreSQL 14をインストールする

※Debianの場合
Debian 11(Bullseye)にApache SupersetとMariaDBをインストールする

Debian 11(Bullseye)にApache SupersetとPostgreSQL 14をインストールする

※Rocky Linuxの場合
Rocky Linux 8にApache SupersetとMariaDBをインストールする

Rocky Linux 8にApache SupersetとPostgreSQL 14をインストールする

※AlmaLinuxの場合
AlmaLinux 8にApache SupersetとMariaDBをインストールする

AlmaLinux 8にApache SupersetとPostgreSQL 14をインストールする

※Dockerの場合
Debian 11とUbuntu 20.04でApache SupersetをDockerを使用してインストールする

※Microk8sの場合
Microk8sで同一ポッド内にPostgreSQLとApache Supersetを配置する

※Minikubeの場合
Minikubeで同一ポッド内にPostgreSQLとApache Supersetを配置する

CSVのアップロード

CSVファイルをブラウザからアップロードして、データベーステーブルに格納することが出来ます。

Apache SupersetでデータベースをCSVアップロード可能に設定する

Apache SupersetでCSVファイルをアップロードして、データベースに格納する

Apache Supersetで日付型の列を持つCSVファイルをアップロードして、データベースに格納する

データセットの論理名称

データベースのテーブルカラム名などの物理名称ではなく、分かりやすい日本語の論理名称をつけることができます。

Apache SupersetでAGGREGATEタイプのチャートの指標に日本語などの論理名称を設定する

Apache Supersetでデータセットの列に論理名称を設定する

チャートによるデータの可視化

チャートの種類によってさまざまな形でデータを可視化することができます。
※表:データの明細を表示するのに適しています。
Apache Supersetでデータセットを集計して表で一覧表示する

Apache Supersetでデータセットのレコードを表で一覧表示する

※棒グラフチャート:系列間の比較に適しています。
Apache Supersetでデータセットを集計して棒グラフで表示する

Apache Supersetで棒グラフチャートの値を表示する

Apache Supersetで棒グラフチャートのY軸ラベルを設定する

※折れ線グラフチャート:時系列のデータを表示するのに適しています。
Apache Supersetでデータセットを集計して折れ線グラフ(Line Chart)で表示する

Apache SupersetでLine Chartのマーカーを表示する

Apache Supersetでデータセットを集計して二重軸時系列グラフ(Mixed Time-Series)で表示する

Apache SupersetのMixed Time-SeriesチャートのX軸のラベル表示を45度に傾ける

※円グラフ・ドーナツグラフ:データの構成比を表示するのに適しています。
Apache Supersetでデータセットを集計して円グラフ(Pie Chart)で表示する

Apache Supersetで円グラフ(Pie Chart)をドーナツグラフに変更して表示する

※領域グラフ:各要素の積み上げを時系列で表示するのに適しています。
Apache Supersetで領域グラフ(Area Chart)の凡例・値を表示する

Apache Supersetでデータセットを集計して積み上げ領域グラフ(Area Chart)で表示する

※数値チャート:KPIなどの値を表示にするのに適しています。
Apache Supersetでデータセットを集計して「数値」チャートで表示する

※Big Number with Trendlineチャート:KPI最新値とその推移を表示するのに適しています。
Apache Supersetでデータセットを集計して数値とトレンドライン(Big Number with Trendline)で表示する

※国別地図チャート:都道府県別の値を可視化するのに適しています。
Apache Supersetでデータセットを集計して都道府県別に表示する

※ゲージチャート:KPIなどのパーセント値を表示にするのに適しています。
Apache Supersetでデータセットを集計してゲージチャートで表示する

※レーダーチャート:複数軸の強み・弱み、バランスを可視化するのに適しています。
Apache Supersetでデータセットを集計してレーダーチャートで表示する

※ツリーマップ:ヒートマップとも呼ばれます。全体に対する各要素の構成、強弱を俯瞰するのに適しています。
Apache Supersetでデータセットを集計してツリーマップで表示する

※ピボットテーブル:行列にフレキシブルに集計データを表形式で表示することができます。
Apache Supersetでデータセットを集計してピボットテーブルで表示する

ダッシュボード

チャートを組み合わせて、ダッシュボードを作ることができます。

Apache Supersetでダッシュボードを作成する

※ダッシュボード内で項目を選択して、データの絞り込みなどを行うこともできます。
Apache Supersetでフィルタボックスを使用してデータを絞り込む

画面のカスタマイズ・修飾

画面の各部の色をCSSで変更したり、画像を追加することもできます。

Apache Supersetのチャートのヘッダー色を変更する

Apache Supersetのダッシュボード内のチャートの背景色を変更する

Apache Supersetのダッシュボードのヘッダー色を変更する

Apache Supersetのダッシュボードの背景色を変更する

Apache Supersetのダッシュボードに任意の画像を追加する

データベース

チャートなどで使用するデータセットをSQLに記述する事も出来ます
Apache SupersetでSQL Editorを使用してデータセットを作成する

Debian 11(Bullseye)/Ubuntu 20.04でApache SupersetにMariaDBへのデータベース接続を追加する

REST APIによるアクセス

REST APIでApache Supersetにアクセスすることもできます。
PythonでApache Supersetのチャート一覧を取得する

MinikubeでNFS上の永続ストレージを使用するApache Httpdをデプロイする

MinikubeでNFS上の永続ストレージを使用するApache Httpdをデプロイするには、以下の手順を実行します。

実行手順

1. テスト用ページの作成
NFSサーバーのホストにテスト用ページを作成します。
sudo mkdir -p /shared_dir/html

echo '<html><head><title>sample</title></head><body>contents on NFS server.</body></html>' | sudo tee /shared_dir/html/index.html

2.永続ボリュームの作成
以下のコマンドで、NFSサーバ上の永続ストレージを作成します。
cat << EOF > nfs-httpd-pv.yml
apiVersion: v1
kind: PersistentVolume
metadata:
  name: nfs-httpd-pv
spec:
  capacity:
    storage: 2Gi
  accessModes:
    - ReadOnlyMany
  nfs:
    server: ※NFSサーバのIPアドレス
    path: "/shared_dir/html" ※NFSサーバのパス
  mountOptions:
    - nfsvers=4.2
EOF

kubectl apply -f ./nfs-httpd-pv.yml

3. 永続ボリューム要求の作成
以下のコマンドで、永続ストレージ要求を作成します。
cat << EOF > nfs-httpd-pvc.yml
apiVersion: v1
kind: PersistentVolumeClaim
metadata:
  name: nfs-httpd-pvc
spec:
  accessModes:
    - ReadOnlyMany
  storageClassName: ""
  resources:
    requests:
      storage: 2Gi
  volumeName: nfs-httpd-pv
EOF

kubectl apply -f ./nfs-httpd-pvc.yml

4. Deploymentの作成
以下のコマンドでhttpd:2.4-alipineのイメージと作成したNFS上の永続ボリュームを使用するDeploymentを作成します。
cat << EOF > httpd-nfs-deployment.yml
apiVersion: apps/v1
kind: Deployment
metadata:
  name: httpd-deployment
  labels:
    app: myhttpd
spec:
  replicas: 1
  selector:
    matchLabels:
      app: myhttpd
  template:
    metadata:
      labels:
        app: myhttpd
    spec:
      containers:
      - name: myhttpd
        image: httpd:2.4-alpine
        ports:
        - containerPort: 80
        volumeMounts:
        - name: documentroot
          mountPath: /usr/local/apache2/htdocs
      volumes:
      - name: documentroot
        persistentVolumeClaim:
          claimName: nfs-httpd-pvc
EOF

kubectl apply -f ./httpd-nfs-deployment.yml

5. サービスの作成
以下のコマンドでサービスを作成します。
cat << EOF > httpd-service.yml
apiVersion: v1
kind: Service
metadata:
  name: httpd-service
spec:
  selector:
    app: myhttpd
  ports:
  - protocol: TCP
    port: 8080
    targetPort: 80
EOF

kubectl apply -f ./httpd-service.yml

6. Port-Fowardingで外部からアクセスできるようにする
kubectl port-forward --address 0.0.0.0 service/httpd-service 8080:8080
ブラウザからhttp://<ホスト名:8080/ にアクセスします

関連情報

Ubuntu 20.04にNFSサーバをインストールする

2022年1月23日日曜日

Debian 11(Bullseye)にDockerとMinikubeとHelmをインストールする

単一ノードのKubernetesを簡単に実行できるMinikubeとパッケージマネージャのHelmをインストールするには以下の手順を実行します。

インストール手順

1.Dockerのインストール
以下のコマンドでDockerをインストールします。
sudo apt-get -y remove docker docker.io containerd runc

sudo apt-get -y install apt-transport-https ca-certificates curl gnupg lsb-release

curl -fsSL https://download.docker.com/linux/debian/gpg | sudo gpg --dearmor -o /usr/share/keyrings/docker-archive-keyring.gpg

echo "deb [arch=amd64 signed-by=/usr/share/keyrings/docker-archive-keyring.gpg] https://download.docker.com/linux/debian \
  $(lsb_release -cs) stable" | sudo tee /etc/apt/sources.list.d/docker.list > /dev/null

sudo apt-get update

sudo apt-get -y install docker-ce docker-ce-cli containerd.io

sudo adduser $USER docker
※いったんログアウトします。以下でバージョンを確認します。
docker version

2. Minikubeのインストール
以下のコマンドでMinikubeをインストールします
curl -LO https://storage.googleapis.com/minikube/releases/latest/minikube-linux-amd64

sudo install minikube-linux-amd64 /usr/local/bin/minikube

minikube start

minikube kubectl -- get po -A

echo 'alias kubectl="minikube kubectl --"' >> ~/.profile

source ~/.profile

3. Dashboardの実行
以下のコマンドでDashboardを実行します。
kubectl proxy --address='0.0.0.0' --disable-filter=true &

minikube dashboard

ブラウザから以下のURLからDashboardを参照します。
http://<MinikubeをインストールしたホストのIP>:8001/api/v1/namespaces/kubernetes-dashboard/services/http:kubernetes-dashboard:/proxy/

〇Dashboardの画面

4. Helmのインストール
以下のコマンドでHelmをインストールして、リポジトリを追加します。
wget https://helm.baltorepo.com/organization/signing.asc

sudo apt-key add signing.asc

sudo apt-get -y install apt-transport-https

echo "deb https://baltocdn.com/helm/stable/debian/ all main" | sudo tee /etc/apt/sources.list.d/helm-stable-debian.list

sudo apt-get update

sudo apt-get -y install helm

・リポジトリの追加
helm repo add stable https://charts.helm.sh/stable

helm repo add bitnami https://charts.bitnami.com/bitnami

※リポジトリ確認
helm repo list

関連情報

・ホストを起動したときに、Minikubeを自動起動させるには、以下のページを参考にしてください。
Ubuntu20.04にインストールしたMinikubeとkubectl proxyを自動起動するように設定する

2022年1月22日土曜日

Ubuntu 20.04にNFSサーバをインストールする

Ubuntu 20.04にNFSサーバをインストールするには、以下の手順を実行します。

インストール手順

以下のコマンドを実行します。
sudo apt-get update

sudo apt-get -y install nfs-kernel-server

sudo mkdir /shared_dir

echo '/shared_dir *(rw,sync,no_root_squash,no_subtree_check)' | sudo tee -a /etc/exports
※適宜公開するパスやネットワークアドレスは設定してください(*の部分に192.168.1.0/24などのネットワークアドレスを設定します)

sudo systemctl restart nfs-kernel-server

・ エクスポートしているディレクトリの確認
sudo exportfs

2022年1月21日金曜日

Minikubeでlocal永続ボリュームを使用するApache Httpdをデプロイする

Minikubeでlocal永続ボリュームを使用するApache Httpdをデプロイするには、以下の手順を実行します。

実行手順

1. テスト用ページの作成
minikubeのホストにテスト用ページを作成します。
minikube ssh

sudo mkdir -p /var/mywww/html

echo '<html><head><title>sample</title></head><body>sample.</body></html>' | sudo tee /var/mywww/html/index.html

exit

2.local永続ボリュームの作成
以下のコマンドを実行してlocal永続ボリュームを作成します
cat << EOF > local-httpd-pv.yml
apiVersion: v1
kind: PersistentVolume
metadata:
  name: local-httpd-pv
spec:
  capacity:
    storage: 5Gi
  accessModes:
  - ReadOnlyMany
  storageClassName: local-storage
  local:
    path: /var/mywww/html
  nodeAffinity:
    required:
      nodeSelectorTerms:
      - matchExpressions:
        - key: kubernetes.io/hostname
          operator: In
          values:
          - minikube
EOF

kubectl apply -f ./local-httpd-pv.yml

3. 永続ボリューム要求の作成
以下のコマンドを実行してlocal永続ボリューム要求を作成します

cat << EOF > local-httpd-pvc.yml
apiVersion: v1
kind: PersistentVolumeClaim
metadata:
  name: local-httpd-pvc
spec:
  accessModes:
    - ReadOnlyMany
  storageClassName: local-storage
  resources:
    requests:
      storage: 5Gi
  volumeName: local-httpd-pv
EOF

kubectl apply -f ./local-httpd-pvc.yml

4. Deploymentの作成
以下のコマンドでhttpd:2.4-alipineのイメージと作成したlocal永続ボリュームを使用するDeploymentを作成します。
cat << EOF > httpd-deployment.yml
apiVersion: apps/v1
kind: Deployment
metadata:
  name: httpd-deployment
  labels:
    app: myhttpd
spec:
  replicas: 1
  selector:
    matchLabels:
      app: myhttpd
  template:
    metadata:
      labels:
        app: myhttpd
    spec:
      containers:
      - name: myhttpd
        image: httpd:2.4-alpine
        ports:
        - containerPort: 80
        volumeMounts:
        - name: documentroot
          mountPath: /usr/local/apache2/htdocs
      volumes:
      - name: documentroot
        persistentVolumeClaim:
          claimName: local-httpd-pvc
EOF

kubectl apply -f ./httpd-deployment.yml

5. サービスの作成
以下のコマンドでサービスを作成します。
cat << EOF > httpd-service.yml
apiVersion: v1
kind: Service
metadata:
  name: httpd-service
spec:
  selector:
    app: myhttpd
  ports:
  - protocol: TCP
    port: 8080
    targetPort: 80
EOF

kubectl apply -f ./httpd-service.yml

6. Port-Fowardingで外部からアクセスできるようにする
kubectl port-forward --address 0.0.0.0 service/httpd-service 8080:8080
ブラウザからhttp://<ホスト名:8080/ にアクセスします

2022年1月20日木曜日

Ubuntu 20.04にDockerとMinikubeとHelmをインストールする

Ubuntu20.04に単一ノードのKubernetesを簡単に実行できるMinikubeとパッケージマネージャのHelmをインストールするには以下の手順を実行します。

インストール手順

1.Dockerのインストール
以下のコマンドでDockerをインストールします。
sudo apt-get -y remove docker docker.io containerd runc

sudo apt-get -y install apt-transport-https ca-certificates curl gnupg lsb-release

curl -fsSL https://download.docker.com/linux/ubuntu/gpg | sudo gpg --dearmor -o /usr/share/keyrings/docker-archive-keyring.gpg

echo "deb [arch=amd64 signed-by=/usr/share/keyrings/docker-archive-keyring.gpg] https://download.docker.com/linux/ubuntu \
  $(lsb_release -cs) stable" | sudo tee /etc/apt/sources.list.d/docker.list > /dev/null

sudo apt-get update

sudo apt-get -y install docker-ce docker-ce-cli containerd.io

sudo adduser $USER docker
※いったんログアウトします。以下でバージョンを確認します。
docker version

2. Minikubeのインストール
以下のコマンドでMinikubeをインストールします
curl -LO https://storage.googleapis.com/minikube/releases/latest/minikube-linux-amd64

sudo install minikube-linux-amd64 /usr/local/bin/minikube

minikube start

minikube kubectl -- get po -A

echo 'alias kubectl="minikube kubectl --"' >> ~/.profile

source ~/.profile

3. Dashboardの実行
以下のコマンドでDashboardを実行します。
kubectl proxy --address='0.0.0.0' --disable-filter=true &

minikube dashboard

ブラウザから以下のURLからDashboardを参照します。
http://<MinikubeをインストールしたホストのIP>:8001/api/v1/namespaces/kubernetes-dashboard/services/http:kubernetes-dashboard:/proxy/

〇Dashboardの画面

4. Helmのインストール
以下のコマンドでHelmをインストールして、リポジトリを追加します。
wget https://helm.baltorepo.com/organization/signing.asc 

sudo apt-key add signing.asc

sudo apt-get -y install apt-transport-https

echo "deb https://baltocdn.com/helm/stable/debian/ all main" | sudo tee /etc/apt/sources.list.d/helm-stable-debian.list

sudo apt-get update

sudo apt-get -y install helm

・リポジトリの追加
helm repo add stable https://charts.helm.sh/stable

helm repo add bitnami https://charts.bitnami.com/bitnami

※リポジトリ確認
helm repo list

関連情報

・ホストを起動したときに、Minikubeを自動起動させるには、以下のページを参考にしてください。
Ubuntu20.04にインストールしたMinikubeとkubectl proxyを自動起動するように設定する

2022年1月19日水曜日

PySimpleGUIでツリー要素の行数を設定する

PySimpleGUIでツリー要素の行数を設定するには、以下のサンプルプログラムのように、num_rowsパラメータで行数を設定します。

サンプル実行手順

以下のファイルを保存して、実行します。

tree_numrows.py
import PySimpleGUI as sg

data=sg.TreeData()
data.insert("", "folder1key", "folder1", [], icon="/usr/share/icons/HighContrast/16x16/places/folder.png")
data.insert("folder1key", "firefox_key", "firefox", [], icon="/usr/share/icons/hicolor/16x16/apps/firefox.png")
data.insert("", "folder2key", "folder2", [], icon="/usr/share/icons/HighContrast/16x16/places/folder.png")
data.insert("folder2key", "writer_key", "LibreOffce Writer", [], icon="/usr/share/icons/hicolor/16x16/apps/libreoffice-writer.png")
sg.theme('SystemDefault')
layout = [
    [sg.Tree(data, [], num_rows=3) ]
]

window = sg.Window('ツリーサンプル', layout, size=(300,150))
# イベントループ
while True:
    event, values = window.read()
    if event == sg.WIN_CLOSED:
        break

window.close()

・実行コマンド
python tree_numrows.py

〇実行結果

関連情報

PySimpleGUIでツリー要素を表示する

PySimpleGUIでツリー要素を領域いっぱいに広げて表示する

PySimpleGUIでツリー要素を展開した状態で表示する

PySimpleGUIでツリー要素の最初の列の幅を指定する

PySimpleGUIでツリー要素のフォントを設定する

PySimpleGUIでツリー要素のテキスト色・背景色を設定する

PySimpleGUIでツリー要素のヘッダーを設定する

PySimpleGUIでツリー要素の列データの位置揃えを設定する

PySimpleGUIでツリー要素の列の文字色・背景色を設定する

PySimpleGUIでツリー要素の列ヘッダーのフォントを設定する

PySimpleGUIでツリー要素の行数を設定する

・PySimpleGUIに関する他の記事はこちらを参照してください。

2022年1月18日火曜日

PySimpleGUIでツリー要素の列ヘッダーのフォントを設定する

PySimpleGUIでツリー要素の列ヘッダーのフォントを設定するには、header_fontパラメータでフォント名・サイズ・スタイルをタプルで渡します。

サンプル実行手順

以下のファイルを保存して、実行します。

tree_header_font.py
import PySimpleGUI as sg

data=sg.TreeData()
data.insert("", "folder1key", "folder1", [], icon="/usr/share/icons/HighContrast/16x16/places/folder.png")
data.insert("folder1key", "firefox_key", "firefox", ["web broser"], icon="/usr/share/icons/hicolor/16x16/apps/firefox.png")
data.insert("", "folder2key", "folder2", [], icon="/usr/share/icons/HighContrast/16x16/places/folder.png")
data.insert("folder2key", "writer_key", "LibreOffce Writer", ["word processor"], icon="/usr/share/icons/hicolor/16x16/apps/libreoffice-writer.png")
sg.theme('SystemDefault')
layout = [
    [sg.Tree(data, ["apps"], col0_width=15, auto_size_columns=False, def_col_width=15, header_font=('Noto Serif CJK JP',14, "italic")) ]
]

window = sg.Window('ツリーサンプル', layout, size=(300,150))
# イベントループ
while True:
    event, values = window.read()
    if event == sg.WIN_CLOSED:
        break

window.close()

・実行コマンド
python tree_header_font.py

〇実行結果

関連情報

PySimpleGUIでツリー要素を表示する

PySimpleGUIでツリー要素を領域いっぱいに広げて表示する

PySimpleGUIでツリー要素を展開した状態で表示する

PySimpleGUIでツリー要素の最初の列の幅を指定する

PySimpleGUIでツリー要素のフォントを設定する

PySimpleGUIでツリー要素のテキスト色・背景色を設定する

PySimpleGUIでツリー要素のヘッダーを設定する

PySimpleGUIでツリー要素の列データの位置揃えを設定する

PySimpleGUIでツリー要素の列の文字色・背景色を設定する

PySimpleGUIでツリー要素の行数を設定する

・PySimpleGUIに関する他の記事はこちらを参照してください。

2022年1月17日月曜日

PySimpleGUIでツリー要素の列の文字色・背景色を設定する

PySimpleGUIでツリー要素の列の文字色・背景色を設定するには、header_text_colorパラメータで列の文字色、header_background_colorパラメータで列の背景色を指定します。

サンプル実行手順

以下のファイルを保存して、実行します。

tree_header_color.py
import PySimpleGUI as sg

data=sg.TreeData()
data.insert("", "folder1key", "folder1", [], icon="/usr/share/icons/HighContrast/16x16/places/folder.png")
data.insert("folder1key", "firefox_key", "firefox", ["web broser"], icon="/usr/share/icons/hicolor/16x16/apps/firefox.png")
data.insert("", "folder2key", "folder2", [], icon="/usr/share/icons/HighContrast/16x16/places/folder.png")
data.insert("folder2key", "writer_key", "LibreOffce Writer", ["word processor"], icon="/usr/share/icons/hicolor/16x16/apps/libreoffice-writer.png")
sg.theme('SystemDefault')
layout = [
    [sg.Tree(data, ["apps"], col0_width=15, auto_size_columns=False, def_col_width=15, header_text_color='#ff8030', header_background_color='#ffeeb3') ]
]

window = sg.Window('ツリーサンプル', layout, size=(300,150))
# イベントループ
while True:
    event, values = window.read()
    if event == sg.WIN_CLOSED:
        break

window.close()

・実行コマンド
python tree_header_color.py

〇実行結果

関連情報

PySimpleGUIでツリー要素を表示する

PySimpleGUIでツリー要素を領域いっぱいに広げて表示する

PySimpleGUIでツリー要素を展開した状態で表示する

PySimpleGUIでツリー要素の最初の列の幅を指定する

PySimpleGUIでツリー要素のフォントを設定する

PySimpleGUIでツリー要素のテキスト色・背景色を設定する

PySimpleGUIでツリー要素のヘッダーを設定する

PySimpleGUIでツリー要素の列データの位置揃えを設定する

PySimpleGUIでツリー要素の列ヘッダーのフォントを設定する

PySimpleGUIでツリー要素の行数を設定する

・PySimpleGUIに関する他の記事はこちらを参照してください。

2022年1月16日日曜日

PySimpleGUIでツリー要素の列データの位置揃えを設定する

PySimpleGUIでツリー要素の列データの位置揃えを設定するには、justificationパラメータでleft, right, centerを指定します。以下のサンプルでは左寄せに設定しています。

サンプル実行手順

以下のファイルを保存して、実行します。

tree_header_justification.py
import PySimpleGUI as sg

data=sg.TreeData()
data.insert("", "folder1key", "folder1", [], icon="/usr/share/icons/HighContrast/16x16/places/folder.png")
data.insert("folder1key", "firefox_key", "firefox", ["web broser"], icon="/usr/share/icons/hicolor/16x16/apps/firefox.png")
data.insert("", "folder2key", "folder2", [], icon="/usr/share/icons/HighContrast/16x16/places/folder.png")
data.insert("folder2key", "writer_key", "LibreOffce Writer", ["word processor"], icon="/usr/share/icons/hicolor/16x16/apps/libreoffice-writer.png")
sg.theme('SystemDefault')
layout = [
    [sg.Tree(data, ["apps"], col0_width=15, auto_size_columns=False, def_col_width=15, justification="left") ]
]

window = sg.Window('ツリーサンプル', layout, size=(300,150))
# イベントループ
while True:
    event, values = window.read()
    if event == sg.WIN_CLOSED:
        break

window.close()

・実行コマンド
python tree_header_justification.py

〇実行結果

関連情報

PySimpleGUIでツリー要素を表示する

PySimpleGUIでツリー要素を領域いっぱいに広げて表示する

PySimpleGUIでツリー要素を展開した状態で表示する

PySimpleGUIでツリー要素の最初の列の幅を指定する

PySimpleGUIでツリー要素のフォントを設定する

PySimpleGUIでツリー要素のテキスト色・背景色を設定する

PySimpleGUIでツリー要素のヘッダーを設定する

PySimpleGUIでツリー要素の列の文字色・背景色を設定する

PySimpleGUIでツリー要素の列ヘッダーのフォントを設定する

PySimpleGUIでツリー要素の行数を設定する

・PySimpleGUIに関する他の記事はこちらを参照してください。

2022年1月15日土曜日

PySimpleGUIでツリー要素のヘッダーを設定する

PySimpleGUIでツリー要素のヘッダーを設定するには、Treeメソッドの第二引数の配列で列ヘッダーの文字列を設定します。
TreeDataのinsertメソッドで列に表示するデータを設定します。
auto_size_columnsにFalseを指定した上でdef_col_widthパラメータで列幅を指定します。

サンプル実行手順

以下のファイルを保存して、実行します。

tree_header.py
import PySimpleGUI as sg

data=sg.TreeData()
data.insert("", "folder1key", "folder1", [], icon="/usr/share/icons/HighContrast/16x16/places/folder.png")
data.insert("folder1key", "firefox_key", "firefox", ["web broser"], icon="/usr/share/icons/hicolor/16x16/apps/firefox.png")
data.insert("", "folder2key", "folder2", [], icon="/usr/share/icons/HighContrast/16x16/places/folder.png")
data.insert("folder2key", "writer_key", "LibreOffce Writer", ["word processor"], icon="/usr/share/icons/hicolor/16x16/apps/libreoffice-writer.png")
sg.theme('SystemDefault')
layout = [
    [sg.Tree(data, ["apps"], col0_width=15, auto_size_columns=False, def_col_width=15) ]
]

window = sg.Window('ツリーサンプル', layout, size=(300,150))
# イベントループ
while True:
    event, values = window.read()
    if event == sg.WIN_CLOSED:
        break

window.close()

・実行コマンド
python tree_header.py

〇実行結果

関連情報

PySimpleGUIでツリー要素を表示する

PySimpleGUIでツリー要素を領域いっぱいに広げて表示する

PySimpleGUIでツリー要素を展開した状態で表示する

PySimpleGUIでツリー要素の最初の列の幅を指定する

PySimpleGUIでツリー要素のフォントを設定する

PySimpleGUIでツリー要素のテキスト色・背景色を設定する

PySimpleGUIでツリー要素の列データの位置揃えを設定する

PySimpleGUIでツリー要素の列の文字色・背景色を設定する

PySimpleGUIでツリー要素の列ヘッダーのフォントを設定する

PySimpleGUIでツリー要素の行数を設定する

・PySimpleGUIに関する他の記事はこちらを参照してください。

2022年1月14日金曜日

Debian 11(Bullseye)にKiCAD6.0をインストールする

KiCADで回路図やプリント基盤をデザインする事ができます。

〇KiCADの画面(Debian 11)

インストール方法

以下のコマンドを実行します。
sudo apt-get -y install flatpak

sudo flatpak remote-add --if-not-exists flathub https://flathub.org/repo/flathub.flatpakrepo

sudo flatpak install -y --from https://flathub.org/repo/appstream/org.kicad.KiCad.flatpakref

関連情報

・KiCADに関する他の情報はこちらを参照してください。

・KiCADのwebサイト
https://kicad-pcb.org/

PySimpleGUIでツリー要素のテキスト色・背景色を設定する

PySimpleGUIでツリー要素のテキスト色・背景色を設定するには、以下のサンプルプログラムのように、text_colorパラメータで文字色、background_colorパラメータで背景色を設定します。

サンプル実行手順

以下のファイルを保存して、実行します。

tree_font_text_bg_color.py
import PySimpleGUI as sg

data=sg.TreeData()
data.insert("", "folder1key", "folder1", [], icon="/usr/share/icons/HighContrast/16x16/places/folder.png")
data.insert("folder1key", "firefox_key", "firefox", [], icon="/usr/share/icons/hicolor/16x16/apps/firefox.png")
data.insert("", "folder2key", "folder2", [], icon="/usr/share/icons/HighContrast/16x16/places/folder.png")
data.insert("folder2key", "writer_key", "LibreOffce Writer", [], icon="/usr/share/icons/hicolor/16x16/apps/libreoffice-writer.png")
sg.theme('SystemDefault')
layout = [
    [sg.Tree(data, [], text_color='#ff8030', background_color='#ffeeb3') ]
]

window = sg.Window('ツリーサンプル', layout, size=(300,150))
# イベントループ
while True:
    event, values = window.read()
    if event == sg.WIN_CLOSED:
        break

window.close()

・実行コマンド
python tree_font_text_bg_color.py

〇実行結果

関連情報

PySimpleGUIでツリー要素を表示する

PySimpleGUIでツリー要素を領域いっぱいに広げて表示する

PySimpleGUIでツリー要素を展開した状態で表示する

PySimpleGUIでツリー要素の最初の列の幅を指定する

PySimpleGUIでツリー要素のフォントを設定する

PySimpleGUIでツリー要素のヘッダーを設定する

PySimpleGUIでツリー要素の列データの位置揃えを設定する

PySimpleGUIでツリー要素の列の文字色・背景色を設定する

PySimpleGUIでツリー要素の列ヘッダーのフォントを設定する

PySimpleGUIでツリー要素の行数を設定する

・PySimpleGUIに関する他の記事はこちらを参照してください。