2022年9月7日水曜日

AlmaLinux 9/Rocky Linux 9でRSSリーダーのFeedReaderをインストールする

AlmaLinux 9/Rocky Linux 9でRSSリーダーのFeedReaderをインストールするには、以下の手順を実行します。

〇FeedReaderの画面(AlmaLinux 9)

〇FeedReaderの画面(Rocky Linux 9)

インストール方法

以下のコマンドを実行します。
sudo dnf -y install flatpak

sudo flatpak remote-add --if-not-exists flathub https://flathub.org/repo/flathub.flatpakrepo

sudo flatpak -y install org.gnome.FeedReader

関連情報

・FeedReaderのwebサイト
https://jangernert.github.io/FeedReader/

2022年9月6日火曜日

AlmaLinux 9/Rocky Linux 9にFeatherPadをインストールする

FeatherPadはシンプルで軽量なマルチタブエディターです。

〇FeatherPadの画面(AlmaLinux 9)

〇FeatherPadの画面(Rocky Linux 9)

インストール方法

以下のコマンドを実行します。
sudo dnf -y update

sudo dnf -y install cmake gcc-c++ libX11-devel libXext-devel qt5-qtx11extras-devel qt5-qtbase-devel qt5-qtsvg-devel hunspell-devel qt5-qttools-devel git

git clone https://github.com/tsujan/FeatherPad.git

cd FeatherPad && mkdir build && cd build

cmake ..

make

sudo make install

関連情報

・FeatherPadのgithubリポジトリ
https://github.com/tsujan/FeatherPad

2022年9月5日月曜日

Raspberry Pi OS(Raspbian Bullseye)にPySimpleGUIとOpenCVをインストールしてwebカメラの映像をウインドウに表示する

PySimpleGUIとOpenCVをインストールしてwebカメラの映像をウインドウに表示するには、以下の手順を実行します。webカメラはUSBカメラのものを使用します。

実行手順

1.pipenvのインストール
pipenvをインストール済みでない場合は、以下のコマンドでインストールします。
sudo apt-get update

sudo apt-get -y install python3-pip python3-distutils python3-dev

sudo pip3 install --upgrade setuptools

pip3 install --user pipenv

echo "export PIPENV_VENV_IN_PROJECT=true" >> ~/.bashrc

echo 'export PATH=$PATH:~/.local/bin' >> ~/.bashrc

source ~/.bashrc

2. PySimpleGUIとOpenCVをインストールした仮想環境の作成
mkdir -p ./psgui-opencv

cd ./psgui-opencv

pipenv --python 3

pipenv install pysimplegui

pipenv install numpy

pipenv install opencv-python

pipenv install opencv-contrib-python

pipenv shell

サンプル実行手順

以下のファイルを保存して、実行します。
psgui_opencv.py
mport PySimpleGUI as sg
import cv2

sg.theme('SystemDefault')
layout = [
  [sg.Image(key='img1')]
]

# webカメラをキャプチャー
capture = cv2.VideoCapture(0)
window = sg.Window("webカメラ画面", layout=layout, finalize=True)
# イベントループ
while True:
  rv, frame = capture.read()
  if rv is True:
    # キャプチャーした画像をpngに変換
    img = cv2.imencode('.png', frame)[1].tobytes()
    # Imageの内容を更新
    window['img1'].update(data=img)

  event, values = window.read(timeout=0)
  if event == sg.WIN_CLOSED:
    break

capture.release()
window.close()

〇実行コマンド
python3 psgui_opencv.py

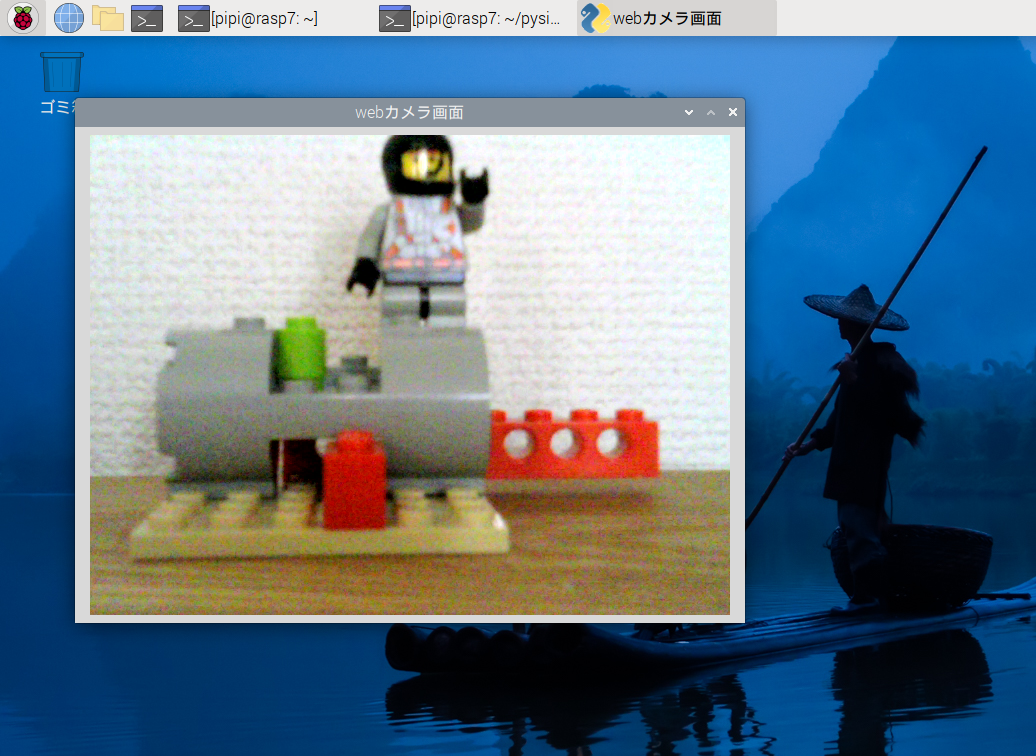
〇実行結果
webカメラの内容がウインドウに表示されます。

〇動作環境
Raspberry Pi OS (Raspbian Bullseye)

関連情報

Raspberry Pi OS(Raspbian Bullseye)にPySimpleGUIをインストールして、簡単なウインドウを表示する

2022年9月4日日曜日

AlmaLinux 9/Rocky Linux 9に動画編集アプリのOpenShotをインストールする

OpenShotは動画編集アプリケーションです。

〇OpenShotの画面(AlmaLinux 9)

〇OpenShotの画面(Rocky Linux 9)

インストール方法

以下のコマンドを実行します。
sudo dnf -y install flatpak

sudo flatpak remote-add --if-not-exists flathub https://flathub.org/repo/flathub.flatpakrepo

sudo flatpak -y install flathub org.openshot.OpenShot

OpenShotの実行方法

シェルから実行する場合は、以下のコマンドを実行します。
flatpak run org.openshot.OpenShot

関連情報

OpenShot Video Editorのまとめ

・OpenShot Video Editorのプロジェクトサイト
https://www.openshot.org/ja/

2022年9月3日土曜日

Ubuntu 22.04/Debian 11(Bullseye)にSystem Monitoring Centerをインストールする

System Monitoring Centerで、CPU/Memory/Disk/Networkの使用状況を監視することが出来ます

〇System Monitoring Centerの画面(Ubuntu 22.04)

〇System Monitoring Centerの画面(Debian Bullseye)

インストール方法

以下のコマンドを実行します。
wget https://github.com/hakandundar34coding/system-monitoring-center/releases/download/v1.26.1-deb_for_stores/system-monitoring-center_1.26.1_all.deb

sudo dpkg -i system-monitoring-center_1.26.1_all.deb

関連情報

・System Monitoring CenterのGithubリポジトリ
https://github.com/hakandundar34coding/system-monitoring-center

2022年9月2日金曜日

AlmaLinux 9/Rocky Linux 9に3D CADアプリSolveSpaceをインストールする

SolveSpaceは、パラメトリック3D CADアプリケーションです。

〇SolveSpaceの画面(AlmaLinux 9)

〇SolveSpaceの画面(Rocky Linux 9)

インストール方法

以下のコマンドを実行します。
1. snapのインストール(※インストール済みの場合はスキップします)
sudo dnf -y install epel-release

sudo dnf -y install snapd

sudo systemctl enable --now snapd.socket

sudo ln -s /var/lib/snapd/snap /snap

2. solvespaceのインストール
sudo snap install solvespace
※「error: too early for operation, device not yet seeded or device model not acknowledged」というエラーメッセージが表示された場合は、しばらく待ってから再実行します。

関連情報

・SolveSpaceのウェブサイト
https://solvespace.com/index.pl

2022年9月1日木曜日

AlmaLinux 9にSpyderをインストールする

SpyderはオープンソースのPyton統合開発環境です。

〇Spyderの画面

インストール方法

以下の手順を実行します。
wget https://repo.anaconda.com/archive/Anaconda3-2022.05-Linux-x86_64.sh

sudo chmod +x Anaconda3-2022.05-Linux-x86_64.sh

sudo ./Anaconda3-2022.05-Linux-x86_64.sh -b -p /opt/anaconda

echo 'export PATH=$PATH:/opt/anaconda/bin' >> ~/.bashrc

source ~/.bashrc

cat << EOF | sudo tee /usr/share/applications/spyder.desktop
[Desktop Entry]
Version=1.0
Type=Application
Terminal=false
Exec=/opt/anaconda/bin/spyder
Icon=/opt/anaconda/share/icons/spyder.png
Name=Spyder
Categories=Development;
EOF

関連情報

・SPyderに関する他の情報はこちらを参照してください。