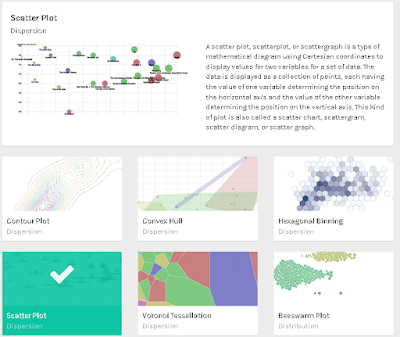
ラベル RAWGraphs の投稿を表示しています。 すべての投稿を表示

2021年8月1日日曜日

Rocky Linux 8.4にRAWGraphsをインストールする

RAWGraphsでCSVなどのデータを簡単に可視化する事ができます。

○RAWGraphsの画面
ブラウザでhttp://<ホスト名またはアドレス>:4000/ を開きます。

インストール方法

以下のコマンドを実行します。
1. Python3/nodeなどのインストール
sudo dnf -y install curl git python3

sudo mkdir -p /opt/rawgraph

cd /opt/rawgraph

# install nodejs12
curl -sL https://rpm.nodesource.com/setup_12.x | sudo bash -

sudo dnf -y install nodejs

sudo npm install -g bower

2. RAWGraphのインストール
sudo git clone https://github.com/densitydesign/raw.git

cd raw

sudo bower install --allow-root

sudo cp js/analytics.sample.js js/analytics.js

# register as a service
cat << EOF | sudo tee /etc/systemd/system/rawgraph.service
[Unit]
Description=rawgraph
[Service]
Type=simple
ExecStart=/usr/bin/python3 -m http.server 4000
WorkingDirectory=/opt/rawgraph/raw
Restart=always
RestartSec=10
[Install]
WantedBy=multi-user.target
EOF

sudo systemctl enable rawgraph

sudo systemctl start rawgraph

3. firewallの設定
sudo firewall-cmd --add-port=4000/tcp --permanent

sudo firewall-cmd --reload

関連情報

・RawGraphsに関する他の情報はこちらを参照してください。

2021年5月3日月曜日

AlmaLinux8.3にRAWGraphsをインストールする

RAWGraphsでCSVなどのデータを簡単に可視化する事ができます。

○RAWGraphsの画面
ブラウザでhttp://<ホスト名またはアドレス>:4000/ を開きます。

インストール方法

以下のコマンドを実行します。
1. Python3/nodeなどのインストール
sudo dnf -y install curl git python3

sudo mkdir -p /opt/rawgraph

cd /opt/rawgraph

# install nodejs12
curl -sL https://rpm.nodesource.com/setup_12.x | sudo bash -

sudo dnf -y install nodejs

sudo npm install -g bower

2. RAWGraphのインストール
sudo git clone https://github.com/densitydesign/raw.git

cd raw

sudo bower install --allow-root

sudo cp js/analytics.sample.js js/analytics.js

# register as a service
cat << EOF | sudo tee /etc/systemd/system/rawgraph.service
[Unit]
Description=rawgraph
[Service]
Type=simple
ExecStart=/usr/bin/python3 -m http.server 4000
WorkingDirectory=/opt/rawgraph/raw
Restart=always
RestartSec=10
[Install]
WantedBy=multi-user.target
EOF

sudo systemctl enable rawgraph

sudo systemctl start rawgraph

3. firewallの設定
sudo firewall-cmd --add-port=4000/tcp --permanent

sudo firewall-cmd --reload

関連情報/h2> ・RawGraphsに関する他の情報はこちらを参照してください。

2021年1月26日火曜日

CentOS8-StreamにRAWGraphsをインストールする

RAWGraphsでCSVなどのデータを簡単に可視化する事ができます。

○RAWGraphsの画面
ブラウザでhttp://<ホスト名またはアドレス>:4000/ を開きます。

インストール方法

以下のコマンドを実行します。
1. Python3/nodeなどのインストール
sudo dnf -y install curl git python3

sudo mkdir -p /opt/rawgraph

cd /opt/rawgraph

# install nodejs12
curl -sL https://rpm.nodesource.com/setup_12.x | sudo bash -

sudo dnf -y install nodejs

sudo npm install -g bower

2. RAWGraphのインストール
sudo git clone https://github.com/densitydesign/raw.git

cd raw

sudo bower install --allow-root

sudo cp js/analytics.sample.js js/analytics.js

# register as a service
cat << EOF | sudo tee /etc/systemd/system/rawgraph.service
[Unit]
Description=rawgraph
[Service]
Type=simple
ExecStart=/usr/bin/python3 -m http.server 4000
WorkingDirectory=/opt/rawgraph/raw
Restart=always
RestartSec=10
[Install]
WantedBy=multi-user.target
EOF

sudo systemctl enable rawgraph

sudo systemctl start rawgraph

3. firewallの設定
sudo firewall-cmd --add-port=4000/tcp --permanent

sudo firewall-cmd --reload

関連情報

・RawGraphsに関する他の情報はこちらを参照してください。

2020年5月28日木曜日

CentOS8.1にRAWGraphsをインストールする

RAWGraphsでCSVなどのデータを簡単に可視化する事ができます。

○RAWGraphsの画面
ブラウザでhttp://<ホスト名またはアドレス>:4000/ を開きます。

〇インストール方法
以下のコマンドを実行します。
sudo dnf -y install curl git python3

sudo mkdir -p /opt/rawgraph

cd /opt/rawgraph

# install nodejs12
curl -sL https://rpm.nodesource.com/setup_12.x | sudo bash -

sudo dnf -y install nodejs

sudo npm install -g bower

# install RAWGraph
sudo git clone https://github.com/densitydesign/raw.git

cd raw

sudo bower install --allow-root

sudo cp js/analytics.sample.js js/analytics.js

# register as a service
cat << EOF | sudo tee /etc/systemd/system/rawgraph.service
[Unit]
Description=rawgraph
[Service]
Type=simple
ExecStart=/usr/bin/python3 -m http.server 4000
WorkingDirectory=/opt/rawgraph/raw
Restart=always
RestartSec=10
[Install]
WantedBy=multi-user.target
EOF

sudo systemctl enable rawgraph

sudo systemctl start rawgraph

# open port 4000
sudo firewall-cmd --add-port=4000/tcp --permanent

sudo firewall-cmd --reload

〇関連情報
・RawGraphsに関する他の情報はこちらを参照してください。

2020年5月27日水曜日

VagrantでRAWGraphsがインストールされた仮想マシン(CentOS 8.1)を構築する

RAWGraphsでCSVなどのデータを簡単に可視化する事ができます。

○RAWGraphsの画面
ブラウザでhttp://<仮想マシンのアドレス>:4000にアクセスします。

○構築方法
以下のVagrantfileを使用して、RAWGraphsがインストールされた仮想マシン(CentOS 8.1)を構築できます。

Vagrantfile
VAGRANTFILE_API_VERSION = "2"

Vagrant.configure(VAGRANTFILE_API_VERSION) do |config|
  config.vm.box = "bento/centos-8.1"
  config.vm.hostname = "co81rawgraph"
  config.vm.provider :virtualbox do |vbox|
     vbox.name = "co81rawgraph"
     vbox.gui = true
     vbox.cpus = 2
     vbox.memory = 4096
  end
config.vm.network "private_network", ip: "192.168.55.101", :netmask => "255.255.255.0"
  config.vm.provision "shell", inline: <<-SHELL
dnf -y install langpacks-ja
localectl set-locale LANG=ja_JP.UTF-8
dnf install -y epel-release
dnf check-update
dnf -y update
timedatectl set-timezone Asia/Tokyo

# install curl/git/python3
dnf -y install curl git python3

mkdir -p /opt/rawgraph
cd /opt/rawgraph

# install nodejs11
curl -sL https://rpm.nodesource.com/setup_11.x | bash -
dnf -y install nodejs
node -v

# install nvm
curl -o- https://raw.githubusercontent.com/creationix/nvm/v0.35.3/install.sh | bash
export NVM_DIR="/root/.nvm"
source /root/.bashrc
nvm --version

# install bower
npm install -g bower
bower -v
#bower init --allow-root

# install rawgraphs
git clone https://github.com/densitydesign/raw.git
cd raw
bower install --allow-root
cp js/analytics.sample.js js/analytics.js


# register as a service
cat << EOF > /etc/systemd/system/rawgraph.service
[Unit]
Description=rawgraph
[Service]
Type=simple
ExecStart=/usr/bin/python3 -m http.server 4000
WorkingDirectory=/opt/rawgraph/raw
Restart=always
RestartSec=10
[Install]
WantedBy=multi-user.target
EOF
sudo systemctl enable rawgraph
sudo systemctl start rawgraph


SHELL
end

2020年4月29日水曜日

Ubuntu 20.04にRAWGraphsをインストールする

RAWGraphsでCSVなどのデータを簡単に可視化する事ができます。

○RAWGraphsの画面

ブラウザでhttp://<ホスト名またはアドレス>:4000/ を開きます。

〇インストール手順
以下のコマンドを実行します。
sudo apt-get -y install curl git

sudo mkdir -p /opt/rawgraph

cd /opt/rawgraph

curl -sL https://deb.nodesource.com/setup_12.x | sudo bash -

sudo apt-get update

sudo apt-get install -y nodejs

sudo npm install -g bower

sudo git clone https://github.com/densitydesign/raw.git

cd raw

sudo bower install --allow-root

sudo cp js/analytics.sample.js js/analytics.js

cat << EOF | sudo tee /etc/systemd/system/rawgraph.service
[Unit]
Description=rawgraph
[Service]
Type=simple
ExecStart=/usr/bin/python3 -m http.server 4000
WorkingDirectory=/opt/rawgraph/raw
Restart=always
RestartSec=10
[Install]
WantedBy=multi-user.target
EOF

sudo systemctl enable rawgraph

sudo systemctl start rawgraph

〇関連情報
・RawGraphsに関する他の情報はこちらを参照してください。

2020年4月20日月曜日

Raspberry Pi(Raspbian Buster)/Debian 10(Buster)にRAWGraphsをインストールする

RAWGraphsでCSVなどのデータを簡単に可視化する事ができます。

○RAWGraphsの画面

ブラウザでhttp://<ホスト名またはアドレス>:4000/ を開きます。

〇インストール手順
以下のコマンドを実行します。
sudo apt-get -y install curl git

sudo mkdir -p /opt/rawgraph

cd /opt/rawgraph

curl -sL https://deb.nodesource.com/setup_12.x | sudo bash -

sudo apt-get update

sudo apt-get install -y nodejs

sudo npm install -g bower

sudo git clone https://github.com/densitydesign/raw.git

cd raw

sudo bower install --allow-root

sudo cp js/analytics.sample.js js/analytics.js

cat << EOF | sudo tee /etc/systemd/system/rawgraph.service
[Unit]
Description=rawgraph
[Service]
Type=simple
ExecStart=/usr/bin/python -m SimpleHTTPServer 4000
WorkingDirectory=/opt/rawgraph/raw
Restart=always
RestartSec=10
[Install]
WantedBy=multi-user.target
EOF

sudo systemctl enable rawgraph

sudo systemctl start rawgraph

2019年1月30日水曜日

VagrantでRAWGraphsがインストールされた仮想マシン(CentOS7.5)を構築する

RAWGraphsでCSVなどのデータを簡単に可視化する事ができます。

○RAWGraphsの画面


○構築方法
以下のVagrantfileを使用して、RAWGraphsがインストールされた仮想マシン(CentOS7.5)を構築できます。

Vagrantfile
VAGRANTFILE_API_VERSION = "2"

Vagrant.configure(VAGRANTFILE_API_VERSION) do |config|
  config.vm.box = "bento/centos-7.5"
  config.vm.hostname = "co75rawgraphs"
  config.vm.provider :virtualbox do |vbox|
     vbox.name = "co75rawgraphs"
     vbox.gui = true
     vbox.cpus = 4
     vbox.memory = 4096
     vbox.customize ["modifyvm", :id, "--nicpromisc2","allow-all"]
  end
config.vm.network "private_network", ip: "192.168.55.105", :netmask => "255.255.255.0"
config.vm.network "public_network", ip: "192.168.1.105", :netmask => "255.255.255.0"
  config.vm.provision "shell", inline: <<-SHELL
localectl set-locale LANG=ja_JP.UTF-8
yum install -y epel-release
yum check-update
yum -y update
yum -y install curl git

mkdir -p /opt/rawgraph
cd /opt/rawgraph

# install nodejs11
curl -sL https://rpm.nodesource.com/setup_11.x | bash -
yum -y install nodejs
node -v

# install nvm
curl -o- https://raw.githubusercontent.com/creationix/nvm/v0.33.11/install.sh | bash
export NVM_DIR="/root/.nvm"
source /root/.bashrc
nvm --version

# install bower
npm install -g bower
bower -v
#bower init --allow-root

# install rawgraphs
git clone https://github.com/densitydesign/raw.git
cd raw
bower install --allow-root
cp js/analytics.sample.js js/analytics.js


# register as a service
cat << EOF > /etc/systemd/system/rawgraph.service
[Unit]
Description=rawgraph
[Service]
Type=simple
ExecStart=/usr/bin/python -m SimpleHTTPServer 4000
WorkingDirectory=/opt/rawgraph/raw
Restart=always
RestartSec=10
[Install]
WantedBy=multi-user.target
EOF
sudo systemctl enable rawgraph
sudo systemctl start rawgraph


SHELL
end

○関連情報
・csvkitを使用して、CSVファイルの操作をコマンドで行うことができます。csvkitに関する記事はこちらを参照してください。

○関連情報
・RAWGraphsに関する他の記事はこちらを参照してください。

2018年12月29日土曜日

VagrantでRAWGraphsがインストールされた仮想マシン(Ubuntu18.04)を構築する

RAWGraphsでCSVなどのデータを簡単に可視化する事ができます。

○RAWGraphsの画面


○構築方法
以下のVagrantfileを使用して、RAWGraphsがインストールされた仮想マシン(Ubuntu18.04)を構築できます。

Vagrantfile
VAGRANTFILE_API_VERSION = "2"

Vagrant.configure(VAGRANTFILE_API_VERSION) do |config|
  config.vm.box = "bento/ubuntu-18.04"
  config.vm.hostname = "ub1804rawgraphs"
config.vm.network "private_network", ip: "192.168.55.104", :netmask => "255.255.255.0"
config.vm.network :public_network, ip:"192.168.1.104"
  config.vm.provider :virtualbox do |vbox|
     vbox.name = "ub1804rawgraphs"
     vbox.gui = true
     vbox.cpus = 4
     vbox.memory = 2048
     vbox.customize ["modifyvm", :id, "--nicpromisc2","allow-all"]
  end
  config.vm.provision "shell", inline: <<-SHELL
apt-get update
apt-get -y install language-pack-ja
sed -i.bak -e "s#http://archive.ubuntu.com/ubuntu/#http://ftp.riken.jp/pub/Linux/ubuntu/#g" /etc/apt/sources.list
localectl set-locale LANG=ja_JP.UTF-8
localectl set-keymap jp106
apt-get update

apt-get -y install curl git

mkdir -p /opt/rawgraph
cd /opt/rawgraph

# install nodejs11
curl -sL https://deb.nodesource.com/setup_11.x | bash -
apt-get install -y nodejs
node -v

# install nvm
curl -o- https://raw.githubusercontent.com/creationix/nvm/v0.33.11/install.sh | bash
export NVM_DIR="/root/.nvm"
source /root/.bashrc
nvm --version

# install bower
npm install -g bower
bower -v

# install rawgraphs
git clone https://github.com/densitydesign/raw.git
cd raw
bower install --allow-root
cp js/analytics.sample.js js/analytics.js


# register as a service
cat << EOF > /etc/systemd/system/rawgraph.service
[Unit]
Description=rawgraph
[Service]
Type=simple
ExecStart=/usr/bin/python -m SimpleHTTPServer 4000
WorkingDirectory=/opt/rawgraph/raw
Restart=always
RestartSec=10
[Install]
WantedBy=multi-user.target
EOF
sudo systemctl enable rawgraph
sudo systemctl start rawgraph

SHELL
end


○関連情報
・csvkitを使用して、CSVファイルの操作をコマンドで行うことができます。csvkitに関する記事はこちらを参照してください。

・RAWGraphsに関する他の記事はこちらを参照してください。

2018年11月30日金曜日

VagrantでRAWGraphsがインストールされた仮想マシン(Debian Stretch/9.5)を構築する

RAWGraphsでCSVなどのデータを簡単に可視化する事ができます。

○RAWGraphsの画面


○構築方法
以下のVagrantfileを使用して、RAWGraphsがインストールされた仮想マシン(Debian Stretch/9.5)を構築できます。

Vagrantfile
VAGRANTFILE_API_VERSION = "2"

Vagrant.configure(VAGRANTFILE_API_VERSION) do |config|
  config.vm.box = "bento/debian-9.5"
  config.vm.hostname = "db95rawgraphs"
config.vm.network "public_network", ip:"192.168.1.103", :netmask => "255.255.255.0"
config.vm.network "private_network", ip: "192.168.55.103", :netmask => "255.255.255.0"
  config.vm.provider :virtualbox do |vbox|
     vbox.name = "db95rawgraphs"
     vbox.gui = true
     vbox.cpus = 4
     vbox.memory = 4096
  end
  config.vm.provision "shell", inline: <<-SHELL
apt-get update
DEBIAN_FRONTEND=noninteractive apt-get -y -o Dpkg::Options::="--force-confdef" -o Dpkg::Options::="--force-confold" upgrade
apt-get -y install task-japanese gawk
sed -i -e 's/# ja_JP.UTF-8 UTF-8/ja_JP.UTF-8 UTF-8/' /etc/locale.gen
locale-gen
update-locale LANG=ja_JP.UTF-8
localectl set-locale LANG=ja_JP.UTF-8
localectl set-keymap jp106
apt-get update
apt-get -y install curl git

mkdir -p /opt/rawgraph
cd /opt/rawgraph

# install nodejs11
curl -sL https://deb.nodesource.com/setup_11.x | bash -
apt-get install -y nodejs
node -v

# install nvm
curl -o- https://raw.githubusercontent.com/creationix/nvm/v0.33.11/install.sh | bash
export NVM_DIR="/root/.nvm"
source /root/.bashrc
nvm --version

# install bower
npm install -g bower
bower -v

# install rawgraphs
git clone https://github.com/densitydesign/raw.git
cd raw
bower install --allow-root
cp js/analytics.sample.js js/analytics.js


# register as a service
cat << EOF > /etc/systemd/system/rawgraph.service
[Unit]
Description=rawgraph
[Service]
Type=simple
ExecStart=/usr/bin/python -m SimpleHTTPServer 4000
WorkingDirectory=/opt/rawgraph/raw
Restart=always
RestartSec=10
[Install]
WantedBy=multi-user.target
EOF
sudo systemctl enable rawgraph
sudo systemctl start rawgraph


SHELL
end


○関連情報
・csvkitを使用して、CSVファイルの操作をコマンドで行うことができます。csvkitに関する記事はこちらを参照してください。

・RAWGraphsに関する他の記事はこちらを参照してください。

2018年10月30日火曜日

DockerでRAWGraphsをインストールしたコンテナを構築・実行する

RAWGraphsでCSVなどのデータを簡単に可視化する事ができます。

〇RAWGraphsの画面

ブラウザからhttp://<Dockerホスト名またはIP>:4000/にアクセスします。

〇構築方法
以下の手順で、RAWGraphsをインストールしたコンテナを構築します。

1. RAWGraphsイメージの作成(Dockerfileがあるフォルダで実行)
docker build -t myrawgraphs .

Dockerfile
FROM node:10-alpine
WORKDIR /
RUN  apk update \
  && apk add --no-cache git curl python \
  && rm -rf /var/cache/apk/* \
  && npm install -g bower \
  && git clone https://github.com/densitydesign/raw.git
WORKDIR /raw
RUN bower install --allow-root \
  && cp js/analytics.sample.js js/analytics.js
EXPOSE 4000
CMD ["/usr/bin/python","-m","SimpleHTTPServer","4000"]

2. RAWGraphsコンテナの構築・実行(docker-compose.ymlがあるフォルダで実行)
docker-compose up -d

docker-compose.yml
version: "2"
services:
  myrawgraphs:
    image: myrawgraphs
    container_name: "myrawgraphs"
    ports:
      - "4000:4000"


○関連情報
・csvkitを使用して、CSVファイルの操作をコマンドで行うことができます。csvkitに関する記事はこちらを参照してください。

・RAWGraphsに関する他の記事はこちらを参照してください。