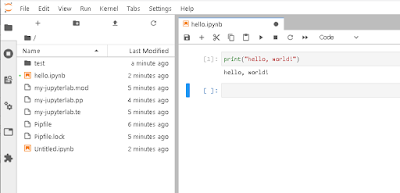
〇Jupyter Labの画面
インストール手順
1.pipenvのインストールsudo dnf -y install python3
sudo pip3 install --upgrade pip
sudo pip3 install --upgrade setuptools
sudo pip3 install pipenv
echo "export PIPENV_VENV_IN_PROJECT=true" >> ~/.bashrc
source ~/.bashrc
2. Jupyterのインストール
mkdir -p ~/jupyter

cd ~/jupyter

pipenv --python 3

pipenv install

pipenv install jupyterlab

pipenv install matplotlib

pipenv install pandas

mkdir -p ~/.jupyter

cat << EOF > ~/.jupyter/jupyter_notebook_config.py
c.JupyterApp.allow_remote_access = True
c.JupyterApp.ip = '0.0.0.0'
c.JupyterApp.open_browser = False
c.JupyterApp.port = 8080
c.JupyterApp.token = 'jupyter'
EOF
3. selinux設定
cat << EOF > ./my-jupyterlab.te
module my-jupyterlab 1.0;

require {
        type init_t;
        type unconfined_exec_t;
        type user_home_t;
        type ephemeral_port_t;
        class tcp_socket { name_connect };
        class dir { create write read setattr rename };
        class file { append execute execute_no_trans ioctl map open read setattr create write relabelfrom rename };
        class lnk_file { getattr read };

}

#============= init_t ==============
allow init_t unconfined_exec_t:file { create execute open read };
allow init_t ephemeral_port_t:tcp_socket { name_connect };
allow init_t user_home_t:dir { create write read setattr rename };
allow init_t user_home_t:file { append execute execute_no_trans ioctl open read setattr map create write relabelfrom rename };
allow init_t user_home_t:lnk_file { getattr read };
EOF

checkmodule -M -m -o my-jupyterlab.mod my-jupyterlab.te
semodule_package -o my-jupyterlab.pp -m my-jupyterlab.mod
sudo semodule -i my-jupyterlab.pp
4. Jupyter Labをサービスとして登録
※ユーザやパスなどは適宜変更してください。
cat << EOF | sudo tee /etc/systemd/system/jupyter.service
[Unit]
Description=Jupyter
[Service]
Type=simple
ExecStart=/home/centos/jupyter/.venv/bin/jupyter-lab
User=centos
Group=centos
WorkingDirectory=/home/centos/jupyter
Restart=always
RestartSec=10
[Install]
WantedBy=multi-user.target
EOF

sudo systemctl enable jupyter

sudo systemctl start jupyter
5. ポート開放
firewallの8080番ポートを開けます
sudo firewall-cmd --add-port=8080/tcp --permanent

sudo firewall-cmd --reload
6. ブラウザで以下のアドレスにアクセスします。
http://<サーバ名またはIPアドレス>:8080/?token=jupyter
0 件のコメント:
コメントを投稿